Oh sweet friend, sometimes you just need a little bit of magic in your day, don’t you? And if that magic happens to involve chocolate, coffee, and whipped cream, well, even better! This Creamy Coffee Chocolate Mousse recipe is one of those simple pleasures that feels incredibly fancy but is honestly SO easy to whip up. It’s the kind of dessert that brings back cozy memories of special occasions, or maybe just quiet evenings curled up on the couch. Forget complicated steps and long baking times – this no-bake beauty comes together in a flash and is guaranteed to impress anyone who takes a bite (including yourself!).
Why You’ll Love This Recipe
- Fast: Seriously quick prep means dessert is closer than you think!
- Easy: Perfect for beginners, no fancy techniques required.
- Giftable: Spoon it into cute jars or ramekins for a lovely edible gift.
- Crowd-Pleasing: Chocolate + Coffee = A universally loved combo.
Ingredients
Here’s what you’ll need to create this dreamy mousse. Most of these are probably already hanging out in your pantry or fridge!
- 1 teaspoon vanilla extract: The classic flavor booster that makes everything taste better.
- 1 cup (170g) semi-sweet chocolate chips: Your chocolate base! Semi-sweet gives you a nice balance.
- 2 teaspoons instant coffee granules: This is where the coffee magic happens. It dissolves easily right into the chocolate.
- 3 tablespoons powdered sugar: Sweetens the whipped cream and helps stabilize it.
- 2 tablespoons hot water: Just enough to help dissolve the coffee and start melting the chocolate.
- 2 cups (480ml) heavy whipping cream, divided: This is essential for that creamy, light texture. Make sure it’s cold!
- Pinch of salt: A tiny bit enhances the chocolate flavor – don’t skip it!
How to Make It
Ready? Let’s make some mousse! You’ve got this.
- Melt the Chocolate & Coffee: Grab a heatproof bowl. Toss in your semi-sweet chocolate chips, instant coffee granules, and hot water. Give it a good stir just until those coffee granules disappear. Now, pop it in the microwave. Heat it in short bursts, about 20 seconds at a time, stirring really well after each burst. Keep going until the chocolate is completely melted and super smooth. You don’t want any lumps! Let this beautiful chocolate-coffee mixture cool down a little while you get the cream ready.
- Whip the Cream (Part 1): In a big mixing bowl (make sure it’s clean and dry!), pour 1½ cups of that cold heavy whipping cream. Add the powdered sugar, vanilla extract, and that pinch of salt. Now, using an electric mixer (or a whisk and some serious arm power!), start whipping. Begin on low speed and gradually increase to high. Whip until you see stiff peaks form. This means when you lift the beaters, the cream stands up straight and holds its shape. Be careful not to overmix here – nobody likes grainy whipped cream!
- Combine Gently: Now for the fun part – combining the two stars! Make sure your melted chocolate-coffee mixture has cooled down a bit. If it’s too hot, it will melt your beautiful whipped cream. Using a rubber spatula, gently fold the cooled chocolate mixture into your stiffly whipped cream. Use slow, sweeping motions, going down the side of the bowl and under, then back up. Your goal is to mix it all together without losing that lovely airy texture you worked so hard for. Stop folding as soon as it’s evenly combined – a few small streaks of white are okay!
- Chill Out: Spoon the mousse evenly into your serving glasses, ramekins, or even cute little jars. Cover each one – plastic wrap pressed gently onto the surface helps prevent a skin from forming. Pop them in the fridge for at least 2 hours. This chilling time is super important for the mousse to set up and get that perfect texture.
- Whip the Cream (Part 2): Just before you’re ready to serve these beauties, whip the remaining ½ cup of heavy whipping cream. You can do this by hand or with an electric mixer until soft peaks form. This is your fluffy topping!
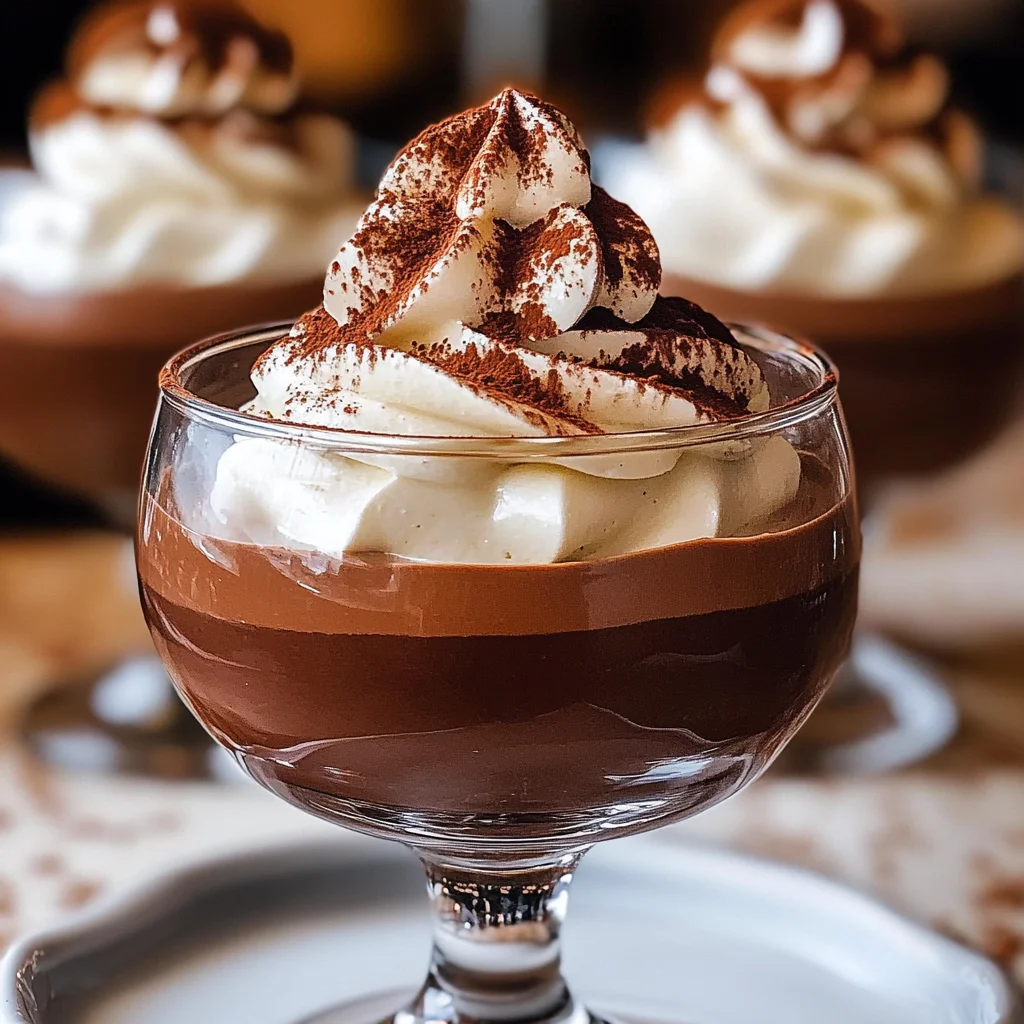
- Serve & Enjoy: Top each chilled mousse serving with a generous dollop of that freshly whipped cream. If you’re feeling fancy (and why not?!), sprinkle a little cocoa powder or shaved chocolate on top. Now, dig in and enjoy your homemade coffee chocolate cloud!

Substitutions & Additions
Want to play around with this recipe? Here are a few ideas:
- Different Chocolate: You could try milk chocolate chips for a sweeter mousse, or a mix of semi-sweet and dark chocolate for more intensity.
- Decaf: Easily make this decaf by using decaf instant coffee granules.
- Flavor Boosts: Add a tiny splash of almond extract or a liqueur like Kahlúa or coffee liqueur (just a tablespoon or two!) to the melted chocolate mixture before folding.
- Toppings Galore: Besides cocoa or shaved chocolate, try a sprinkle of chopped nuts, mini chocolate chips, a drizzle of chocolate syrup, or even fresh berries.
Tips for Success
Keep these pointers in mind for your best mousse experience:
- Cool the Chocolate: This is crucial! If the melted chocolate is too warm, it will deflate your whipped cream and result in a runny mousse. Let it cool until it’s just warm or even room temperature, but not so cool it starts to harden.
- Cold Cream is Key: Make sure your heavy whipping cream is straight from the fridge. Cold cream whips up much better and holds its shape longer.
- Don’t Overmix: Be gentle when folding the chocolate into the whipped cream. Overmixing will knock the air out, making your mousse dense instead of light and airy. Stop as soon as it’s just combined.
- Give it Time to Chill: The minimum 2 hours in the fridge is necessary for the mousse to set properly. Don’t rush this step!
- Prep Ahead: This mousse is a fantastic make-ahead dessert! Prepare steps 1-4 up to 24 hours in advance and store covered in the fridge. Whip the fresh cream topping just before serving.
How to Store It
Any leftover mousse (if there is any!) should be covered and kept in the refrigerator. It will stay delicious for about 3-4 days. The texture might firm up a bit more over time.
FAQs
Got questions? I’ve got answers!
Q: Can I make this without an electric mixer?
A: Yes, but be prepared for a workout! You can whip the cream by hand with a whisk. It will take significantly longer and require some serious arm power, but it’s definitely possible!
Q: What kind of instant coffee should I use?
A: Any standard instant coffee granules will work just fine. Make sure they are granules that dissolve in hot water.
Q: Why didn’t my mousse set?
A: The most common reasons are either the chocolate mixture wasn’t cooled enough before folding, or the whipped cream wasn’t whipped to stiff peaks, or it wasn’t chilled for long enough. Make sure your ingredients are cold and you follow the chilling time!

Easy & Dreamy Coffee Chocolate Mousse (No-Bake!)
Ingredients
Equipment
Method
- Step 1: Melt the Chocolate & Coffee: Grab a heatproof bowl. Toss in your semi-sweet chocolate chips, instant coffee granules, and hot water. Give it a good stir just until those coffee granules disappear. Now, pop it in the microwave. Heat it in short bursts, about 20 seconds at a time, stirring really well after each burst. Keep going until the chocolate is completely melted and super smooth. Let this beautiful chocolate-coffee mixture cool down a little while you get the cream ready.
- Step 2: Whip the Cream (Part 1): In a big mixing bowl (make sure it's clean and dry!), pour 1½ cups of that cold heavy whipping cream. Add the powdered sugar, vanilla extract, and that pinch of salt. Now, using an electric mixer (or a whisk and some serious arm power!), start whipping. Begin on low speed and gradually increase to high. Whip until you see stiff peaks form. Be careful not to overmix here.
- Step 3: Combine Gently: Make sure your melted chocolate-coffee mixture has cooled down a bit. Using a rubber spatula, gently fold the cooled chocolate mixture into your stiffly whipped cream. Use slow, sweeping motions. Stop folding as soon as it's evenly combined – a few small streaks of white are okay!
- Step 4: Chill Out: Spoon the mousse evenly into your serving glasses, ramekins, or even cute little jars. Cover each one – plastic wrap pressed gently onto the surface helps prevent a skin from forming. Pop them in the fridge for at least 2 hours. This chilling time is super important for the mousse to set up and get that perfect texture.
- Step 5: Whip the Cream (Part 2): Just before you're ready to serve these beauties, whip the remaining ½ cup of heavy whipping cream. You can do this by hand or with an electric mixer until soft peaks form. This is your fluffy topping!
- Step 6: Serve & Enjoy: Top each chilled mousse serving with a generous dollop of that freshly whipped cream. If you're feeling fancy, sprinkle a little cocoa powder or shaved chocolate on top. Now, dig in and enjoy your homemade coffee chocolate cloud!