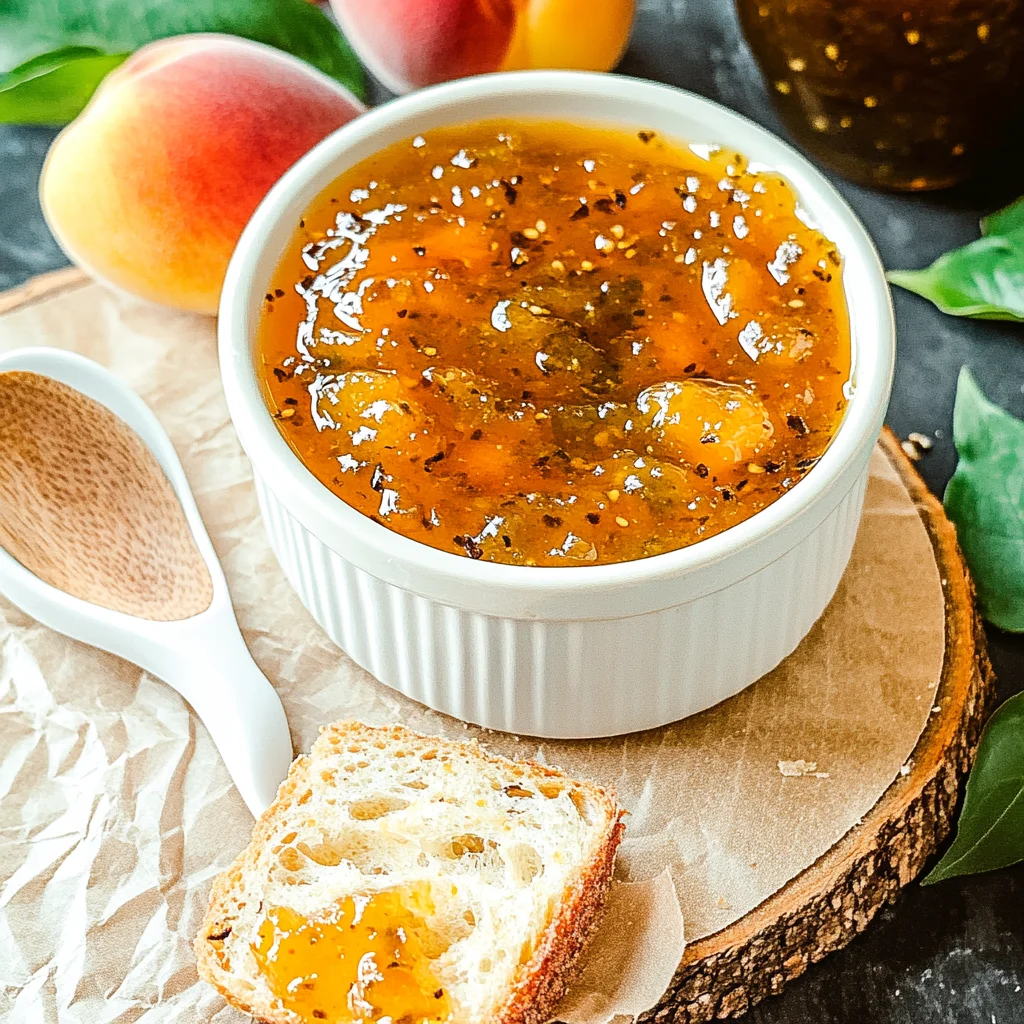
Oh, friend, there are some flavors that just take you right back, aren’t there? For me, it’s often the taste of summer peaches – juicy, sun-kissed, and bursting with sweetness. But what if I told you we could take that nostalgic comfort and give it a playful, surprising kick? Get ready to fall head over heels for Peach Jalapeño Jam!
This isn’t just any jam; it’s a little jar of sunshine with a secret spicy smile. It’s incredibly easy to whip up, comes together faster than you might think, and trust me, it’s so memorable, you’ll be making it year after year. Whether you’re a seasoned canner or just trying your hand at homemade preserves for the first time, this recipe is practically foolproof. Let’s get jamming!
Why You’ll Love Peach Jalapeño Jam
- Fast: From start to jar, this recipe is surprisingly quick, perfect for when you’re craving homemade goodness without the all-day fuss.
- Easy: No complicated steps or fancy equipment needed. If you can chop and stir, you can make this jam!
- Giftable: Pour this gorgeous jam into cute jars, tie a ribbon, and you’ve got the most thoughtful, unique gift for friends, family, or neighbors.
- Crowd-Pleasing: The balance of sweet peaches and a hint of jalapeño heat is universally loved. It’s intriguing without being overpowering.
Ingredients
Gathering your ingredients is half the fun! Here’s what you’ll need to make this incredible sweet and spicy jam:
- 5-6 medium peaches: Choose ripe, fragrant peaches. Freestone varieties are easiest to work with for peeling and pitting, but clingstone will work too with a little extra patience!
- 4-5 small jalapeños: These little green peppers bring the heat! If you prefer a milder jam, you can reduce the number of jalapeños or make sure to remove all the seeds and white membranes (that’s where most of the capsaicin, or heat, lives!).
- 1 tablespoon lemon zest: This really brightens up the peach flavor and adds a lovely aromatic touch.
- 2 tablespoons lemon juice: Essential for flavor balance and also helps with the jam’s setting process. Freshly squeezed is always best!
- 3 cups granulated sugar: The star of the show for sweetness and proper jam consistency. Don’t be tempted to reduce it too much, as it’s crucial for the jam to set correctly.
How to Make Peach Jalapeño Jam
Alright, let’s get our hands a little sticky and make some magic happen! This process is so straightforward, you’ll wonder why you haven’t tried it sooner.
- Prepare Your Fruit: First things first, you’ll want to get those beautiful peaches ready. Give them a good wash, then peel and pit them. Now, finely chop them up. Don’t worry about perfection here, just aim for small, even pieces. Next, turn your attention to the jalapeños. Wash them thoroughly. This is where you decide on your heat level! For a milder jam, you absolutely want to remove the seeds and the white membranes inside – that’s where the majority of the heat hides. For a bolder kick, you can leave some seeds in. Finely chop these too. Chef’s Tip: I always wear gloves when handling jalapeños to avoid any “spicy” surprises later on!
- Cook the Fruit Mixture: Grab a large, heavy-bottomed saucepan – you’ll want something that can handle a good boil without overflowing. Combine your finely chopped peaches and jalapeños, along with the bright lemon zest and the zesty lemon juice. Place the saucepan over medium-high heat. You’ll want to stir frequently here to prevent anything from sticking to the bottom. Keep an eye on it until it reaches a gentle, happy boil.
- Add Sugar and Thicken: Once your fruit mixture is gently boiling, it’s time for the sugar. Stir in the granulated sugar, making sure to keep stirring until every last crystal has completely dissolved. Now, the real fun begins! You need to maintain a full, rolling boil for about 15-20 minutes. A “rolling boil” means it’s bubbling so vigorously that it won’t stop even when you stir it. This high heat is crucial for activating the pectin in the fruit (even though we aren’t adding extra pectin, fruit has natural pectin) and evaporating the water, allowing your jam to thicken. To test if your jam is ready, dip a metal spoon into the mixture. If it coats the back of the spoon without quickly dripping off, you’ve hit the sweet spot! Alternatively, you can drop a small dollop onto a chilled plate; if it wrinkles when you push it with your finger, it’s ready. If you’re looking for another delightful sweet and spicy treat, you might also enjoy making easiest pineapple cowboy candy – another fantastic way to enjoy a bit of heat with your sweet.
- Jar and Cool: While your jam is boiling, get your jars ready. Wash your canning jars (or any clean glass jars with tight-fitting lids) in hot, soapy water and dry them completely. You don’t need to sterilize them for this recipe since it’s a small batch that will be stored in the refrigerator, but cleanliness is key! Carefully transfer the hot, bubbly jam into your prepared jars, leaving about a ¼-inch headspace from the rim. This space is important! Use a clean, damp towel to wipe the jar rims clean – any jam residue can prevent a proper seal. Securely seal with lids, and then simply let the jars cool down to room temperature on your counter. As they cool, you might hear that satisfying “pop!” sound, which means your jars are sealing. If you’re passionate about preserving, you might also be interested in my classic homemade peach jam recipe for a non-spicy variation.
Substitutions & Additions
The beauty of homemade jam is how adaptable it can be! Don’t be afraid to play around with this recipe:
- Peaches: Nectarines or apricots would work beautifully here for a slightly different flavor profile.
- Jalapeños: For more heat, try a habanero or serrano pepper (use less!). For less heat, use a milder pepper like a bell pepper (green or red for color!) or simply scrape out all the seeds and membranes from your jalapeños.
- Spices: A pinch of cinnamon, a tiny dash of nutmeg, or even a star anise pod added during cooking (and removed before jarring) can add wonderful depth.
- Herbs: Fresh mint or basil could be finely chopped and added at the very end for a unique, refreshing twist.
- Vinegar: For a more “pepper jelly” vibe, add a tablespoon or two of apple cider vinegar along with the lemon juice.
Tips for Success
Even though this jam is super easy, a few little tips can make all the difference for a perfectly delicious batch:
- Ripe Fruit is Key: The riper your peaches, the more natural sweetness and pectin they’ll have, resulting in better flavor and set.
- Adjust Heat to Taste: Always start with fewer jalapeños or remove more seeds if you’re unsure about the spice level. You can always add a pinch of dried red pepper flakes later if you want more kick, but you can’t take heat away!
- Don’t Rush the Boil: That rolling boil is vital. It’s not just about cooking; it’s about reducing the liquid and activating the fruit’s natural pectin so your jam sets properly.
- Use a Big Pot: Jam bubbles up quite a bit, so a large, wide pot (like a Dutch oven) will prevent boil-overs and allow for quicker evaporation.
- Cold Plate Test: Keep a small plate in the freezer while your jam cooks. When you think it’s ready, spoon a little jam onto the cold plate, wait 30 seconds, then push it with your finger. If it wrinkles, it’s done!
- Prep Ahead: You can peel and chop your peaches and jalapeños a day in advance, storing them in separate airtight containers in the fridge. This makes jam-making day even quicker!
How to Store Peach Jalapeño Jam
Once your beautiful Peach Jalapeño Jam has cooled completely and sealed (if using proper canning jars and methods for shelf-stable storage), here’s how to keep it fresh:
- Refrigerator Storage: For this small batch and quick jam method, refrigeration is your best friend. Store sealed jars in the refrigerator for up to 3-4 weeks. Once opened, consume within 1-2 weeks.
- Freezer Storage: For longer storage, you can freeze this jam! Pour the cooled jam into freezer-safe containers, leaving about ½ inch of headspace (as liquids expand when frozen). It will keep well for up to 6 months in the freezer. Thaw in the refrigerator before using.
- Canning for Shelf Stability: If you want to make this jam shelf-stable for pantry storage, you’ll need to follow proper water bath canning procedures, including sterilizing jars and processing them for the recommended time (typically 10 minutes for half-pint jars at sea level). Always consult reliable canning resources like the National Center for Home Food Preservation for specific guidelines to ensure safety.
FAQs
Q: Can I use frozen peaches for this jam?
A: Absolutely! If fresh peaches aren’t in season, frozen sliced peaches work wonderfully. Just make sure to thaw them first and drain any excess liquid before chopping and adding to the pot.
Q: My jam didn’t set. What happened?
A: Don’t panic! This is a common issue. It usually means it didn’t boil long enough or at a high enough temperature to activate the pectin and reduce sufficiently. You can gently reheat the jam, bring it back to a rolling boil, and cook for another 5-10 minutes, testing for doneness frequently. Sometimes adding a tablespoon of store-bought pectin mixed with a bit of sugar can help too.
Q: How can I use Peach Jalapeño Jam?
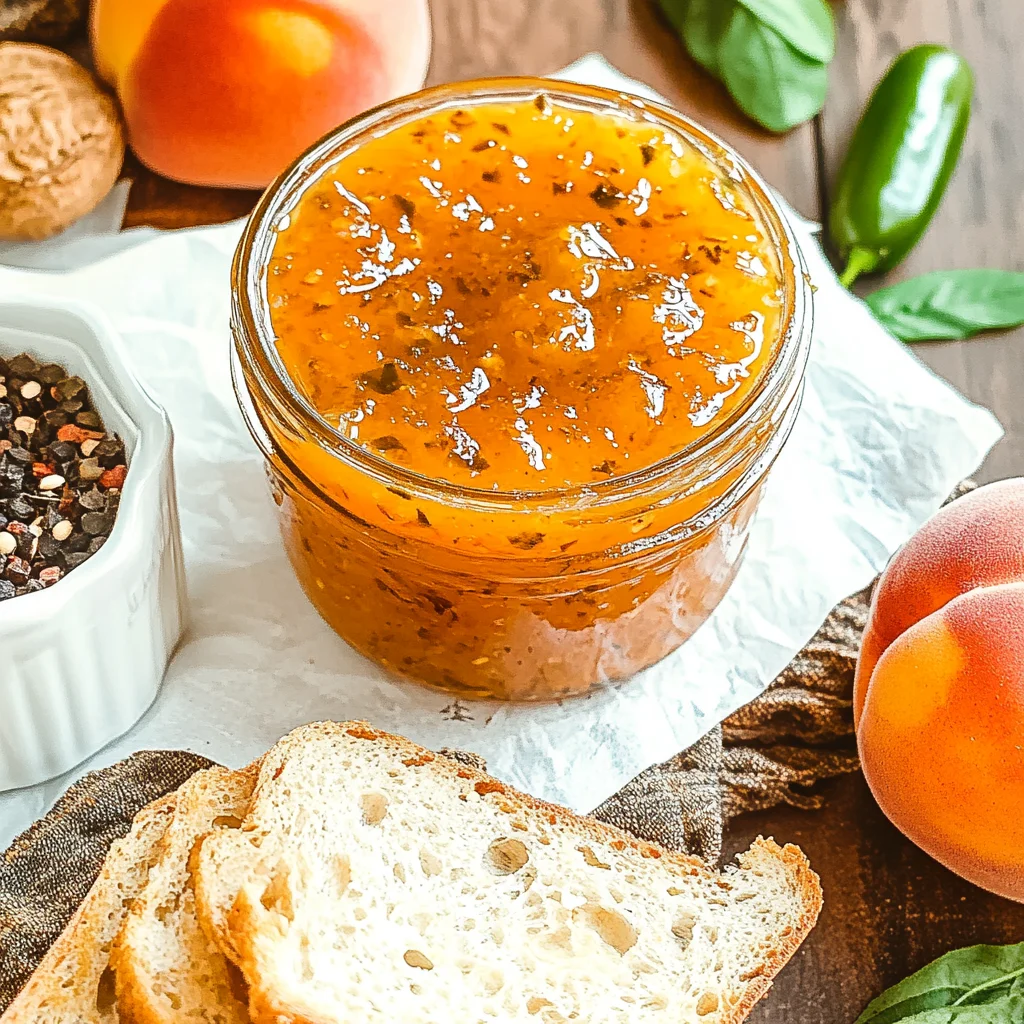
A: Oh, the possibilities are endless! It’s fantastic on toast, biscuits, or bagels, of course. But also try it as a glaze for grilled chicken or pork, mixed into cream cheese for a savory spread, as a unique topping for grilled peach burrata crostini, or even as a surprise addition to a cheese board. It’s truly versatile!
For more delicious and easy recipes, be sure to follow us on Pinterest!
Peach Jalapeño Jam
Ingredients
Equipment
Method
- Step 1: Prepare Your Fruit: Wash, peel, and pit the peaches, then finely chop them into small, even pieces. For the jalapeños, wash thoroughly. Decide on your heat level: for milder jam, remove all seeds and white membranes; for a bolder kick, you can leave some seeds in. Finely chop the jalapeños. (Chef's Tip: Always wear gloves when handling jalapeños to avoid any 'spicy' surprises).
- Step 2: Cook the Fruit Mixture: In a large, heavy-bottomed saucepan, combine the finely chopped peaches and jalapeños, along with the lemon zest and lemon juice. Place the saucepan over medium-high heat. Stir frequently to prevent sticking until the mixture reaches a gentle, happy boil.
- Step 3: Add Sugar and Thicken: Once the fruit mixture is gently boiling, stir in the granulated sugar, making sure to keep stirring until every last crystal has completely dissolved. Now, maintain a full, rolling boil for about 15-20 minutes. A 'rolling boil' means it’s bubbling so vigorously that it won't stop even when you stir it. To test if your jam is ready, dip a metal spoon into the mixture; if it coats the back of the spoon without quickly dripping off, it’s ready. Alternatively, drop a small dollop onto a chilled plate; if it wrinkles when you push it with your finger, it's done.
- Step 4: Jar and Cool: While your jam is boiling, get your jars ready. Wash your canning jars (or any clean glass jars with tight-fitting lids) in hot, soapy water and dry them completely. Carefully transfer the hot, bubbly jam into your prepared jars, leaving about ¼-inch headspace from the rim. Use a clean, damp towel to wipe the jar rims clean. Securely seal with lids, and then simply let the jars cool down to room temperature on your counter. As they cool, you might hear that satisfying 'pop!' sound, which means your jars are sealing.