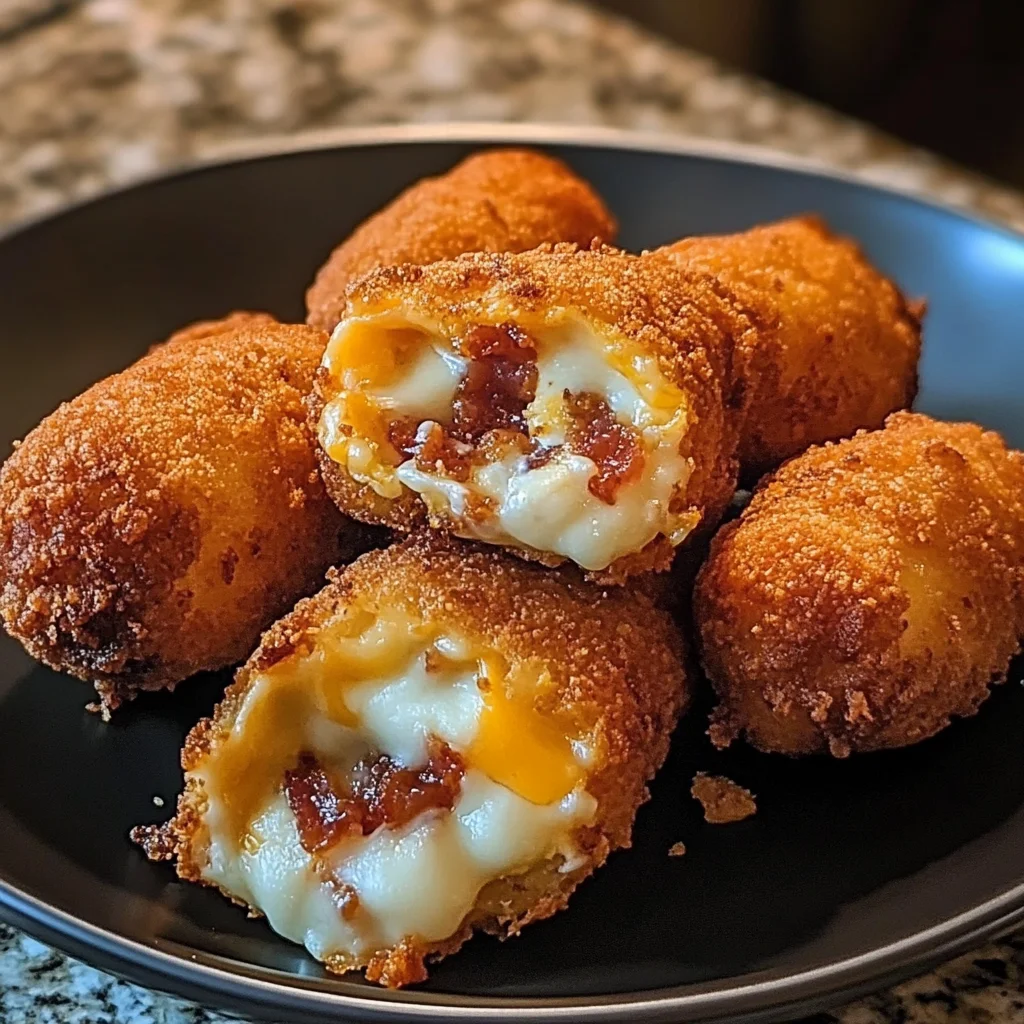
Hey there, friend! Get ready for a recipe that’s about to become your absolute favorite go-ahead-and-make-a-double-batch kind of deal. You know those moments when you’re craving something comforting, packed with flavor, and just plain FUN? That’s where these Crispy Chicken Bacon Loaded Cheese Bombs come in. I remember the first time I whipped these up for a casual get-together, and they vanished faster than I could even grab one for myself! They’re everything you love about loaded flavors wrapped up in a perfectly crispy, bite-sized package. And honestly? They are way easier to make than you might think. Let’s get cooking!
Why You’ll Love This Recipe
- Fast: From mixing bowl to happy belly in no time.
- Easy: No fancy techniques, just simple steps for maximum deliciousness.
- Crowd-pleasing: Seriously, these disappear like magic at parties!
- Loaded Flavor: Chicken, bacon, AND cheese? Yes, please!
Ingredients
Gather your goodies! Most of these are probably already hanging out in your kitchen.
- 1 lb ground chicken: Our lean and tasty base.
- 6 slices bacon, cooked and crumbled: Salty, smoky crunch is essential! Make it nice and crispy.
- 1 cup shredded mozzarella cheese: Hello, melty, cheesy pull!
- ½ cup cream cheese, softened: This is the secret for that creamy, dreamy filling and helps bind everything together.
- 1 tsp garlic powder: Adds that warm, savory depth.
- ½ tsp onion powder: A little extra boost of flavor.
- ½ tsp salt: Enhances all those delicious tastes.
- ¼ tsp black pepper: Just a pinch for balance.
- 1 package wonton wrappers: These are your magic little envelopes of crispiness!
- Oil for frying: You’ll need a few inches in your pot – canola, vegetable, or peanut oil work great.
- Chopped parsley for garnish: Makes them look pretty and adds a touch of freshness!
How to Make It
Alright, let’s turn these simple ingredients into irresistible bombs!
1. Prepare Your Dreamy Filling: Grab a big mixing bowl – one you can really get into! Toss in the ground chicken, your lovely crumbled bacon, the shredded mozzarella, and that softened cream cheese. Now, add in the garlic powder, onion powder, salt, and pepper. Time to get your hands dirty (or use a sturdy spoon!) and mix, mix, mix. You want everything super well combined, like a happy flavor family all snuggled up together.
2. Assemble Your Little Bombs: This is the fun part! Lay a single wonton wrapper flat on your clean counter. Take about a tablespoon of that delicious filling you just made and place it right in the center. Now, moisten the edges of the wrapper lightly with just a tiny bit of water using your finger. Imagine you’re sealing a precious treasure! Fold the corners of the wrapper up towards the center, gently but firmly pressing the edges together to seal it into a secure little pouch or bomb shape. You want to make sure there are absolutely no gaps – we don’t want that yummy filling escaping during frying! Keep going until you’ve used up all your filling and wrappers.
3. Get the Oil Hot: Find a deep skillet, a Dutch oven, or even a deep fryer if you have one. Pour in enough oil so it reaches about 2-3 inches deep. Pop it on medium heat and let it warm up to around 350°F (175°C). If you don’t have a thermometer, a quick trick is to drop a tiny scrap of wonton wrapper into the oil. If it sizzles happily and bobs up to the surface right away, you’re good to go!
4. Fry Those Bombs to Golden Perfection: Carefully, carefully, add your assembled bombs to the hot oil. Don’t overcrowd the pot – give them space to cook evenly and keep the oil temperature steady. Work in batches if needed. Let them fry for about 2-3 minutes on each side, or until they are beautifully golden brown and crispy all over. Make sure that ground chicken filling is cooked through – you’ll know by the color and how firm they feel.
5. Drain & Serve Hot: Use a slotted spoon or a spider tool to scoop the cooked bombs out of the oil. Transfer them to a plate lined with paper towels to catch any extra oil. Give them a little sprinkle of that fresh chopped parsley right away – it adds a pop of color and freshness. Serve these beauties piping hot with your favorite dipping sauces! Marinara, ranch, sweet chili sauce, or even a creamy sriracha dip would be amazing.

Substitutions & Additions
Want to play around? Here are some ideas!
- Change the Protein: Ground turkey or even pre-cooked shredded chicken would work in place of ground chicken.
- Switch the Cheese: A blend of cheddar and Monterey Jack could add a different cheesy profile.
- Add Some Heat: Mix in a pinch of cayenne pepper or some finely diced pickled jalapenos for a spicy kick!
- Extra Flavor Boost: Add a dash of smoked paprika, a sprinkle of dried chives, or a tiny splash of Worcestershire sauce to the filling mixture.
- Not a Fan of Frying? You can try air frying these! Preheat your air fryer, lightly spray the bombs with oil, and cook until golden and crispy, flipping halfway through. They might not be exactly the same as deep-fried, but they’ll still be delicious! Baking is also an option, but they might not get quite as uniformly crispy.
Tips for Success
Here are a few little pointers I’ve picked up to make sure your bombs are a total hit!
- Don’t Be Greedy with the Filling: Just about a tablespoon is perfect. Too much and it’s harder to seal, and you risk blowouts!
- Seal Them Tight! Moisten the edges with water and really press them together. This is the most important step to prevent leaks.
- Mind the Heat: Make sure your oil is hot enough before you start frying, but not too hot that it burns the wrappers before the inside cooks. Around 350°F is the sweet spot.
- Fry in Batches: Giving the bombs space in the oil helps maintain the temperature and ensures they cook evenly and get super crispy. Don’t cram the pot!
- Prep Ahead: You can make the filling mixture a day or two in advance and keep it covered in the fridge. You can even assemble the bombs a few hours ahead, arrange them on a baking sheet lined with parchment paper, cover them loosely with plastic wrap, and keep them chilled until you’re ready to fry. Just be careful the wrappers don’t dry out.
How to Store It
If by some miracle you have leftovers (seriously, good luck!), here’s how to handle them.
Once fried and cooled completely, store any leftover Crispy Chicken Bacon Loaded Cheese Bombs in an airtight container in the refrigerator for up to 3-4 days. To reheat them and get that crispiness back, I highly recommend popping them in an air fryer or oven (around 350-375°F or 175-190°C) until they are heated through and crispy again. Microwaving will make them soft, which isn’t nearly as fun!
The uncooked filling mixture can be stored in an airtight container in the fridge for up to 3 days.
FAQs
Got questions? I’ve got answers!
Q: Can I bake these instead of frying?
A: Yes, you can! While frying gives the best crispiness, you can bake them at around 375°F (190°C) for 15-20 minutes, flipping halfway, until golden. Lightly brush or spray them with oil first for better browning. They might not be quite as uniformly crisp as fried ones, but they’ll still be tasty!
Q: Can I make the filling ahead of time?
A: Absolutely! The filling mixture is perfect for making a day or two in advance. Keep it covered in the fridge until you’re ready to assemble and fry.
Q: My bombs leaked while frying! What went wrong?
A: This usually happens if the edges weren’t sealed tightly enough. Make sure to moisten the edges well with water and press them firmly together all around the filling to create a secure pouch.
Q: What are the best dipping sauces for these?
A: Oh, so many options! Classic marinara, creamy ranch dressing, sweet chili sauce, barbecue sauce, or even a sriracha mayo are all fantastic choices. Don’t be afraid to try a few!

Crispy Chicken Bacon Loaded Cheese Bombs
Ingredients
Equipment
Method
- 1. Prepare Your Dreamy Filling: Grab a big mixing bowl. Toss in the ground chicken, crumbled bacon, shredded mozzarella, and softened cream cheese. Add the garlic powder, onion powder, salt, and pepper. Mix everything super well combined using your hands or a sturdy spoon.
- 2. Assemble Your Little Bombs: Lay a single wonton wrapper flat. Place about a tablespoon of filling in the center. Moisten the edges lightly with water using your finger. Fold the corners up towards the center, pressing the edges firmly to seal it into a secure pouch or bomb shape. Ensure no gaps remain. Repeat until all filling and wrappers are used.
- 3. Get the Oil Hot: Find a deep skillet, Dutch oven, or deep fryer. Pour in enough oil to reach about 2-3 inches deep. Heat on medium heat to around 350°F (175°C). Test with a small wonton scrap – it should sizzle and bob up.
- 4. Fry Those Bombs to Golden Perfection: Carefully add bombs to the hot oil, working in batches to avoid overcrowding. Fry for about 2-3 minutes on each side until beautifully golden brown, crispy, and the chicken filling is cooked through.
- 5. Drain & Serve Hot: Use a slotted spoon to transfer cooked bombs to a plate lined with paper towels. Sprinkle with fresh chopped parsley. Serve immediately with your favorite dipping sauces (marinara, ranch, sweet chili sauce, etc.).