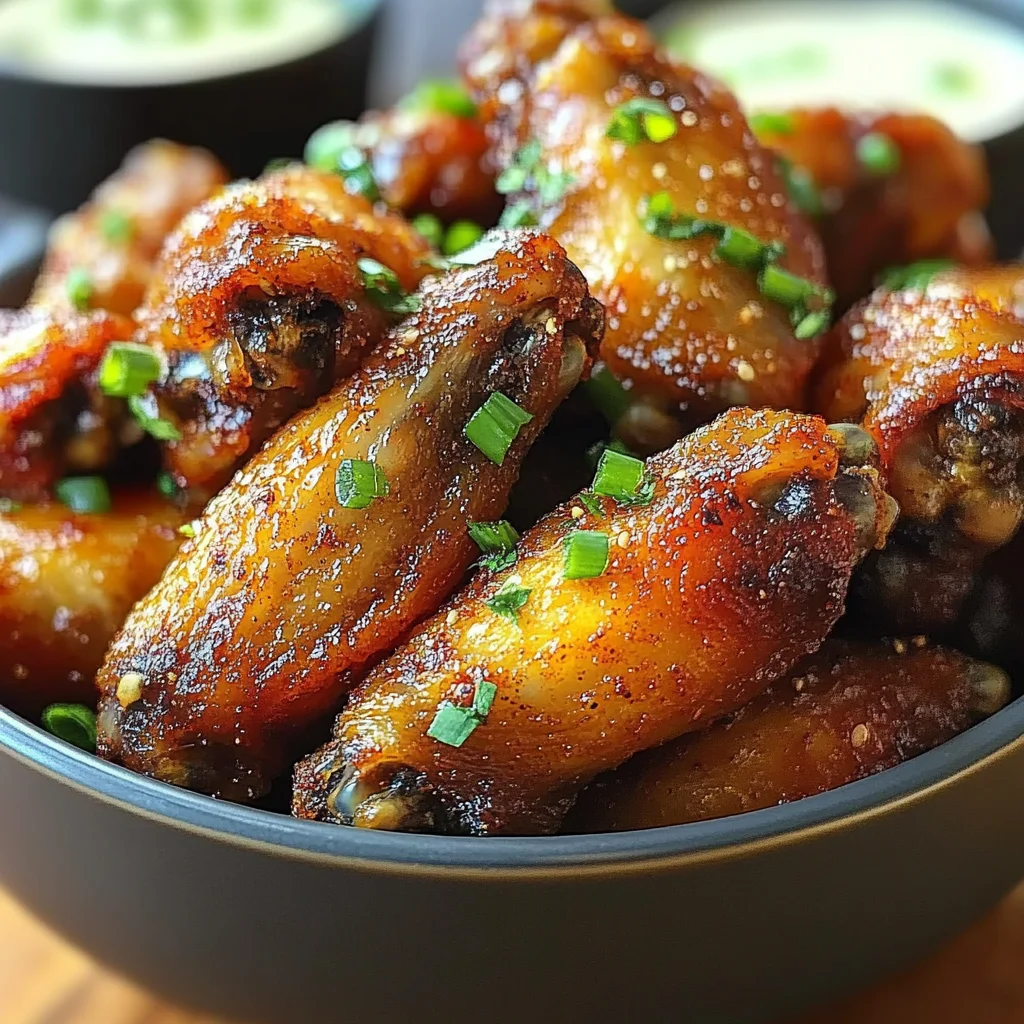
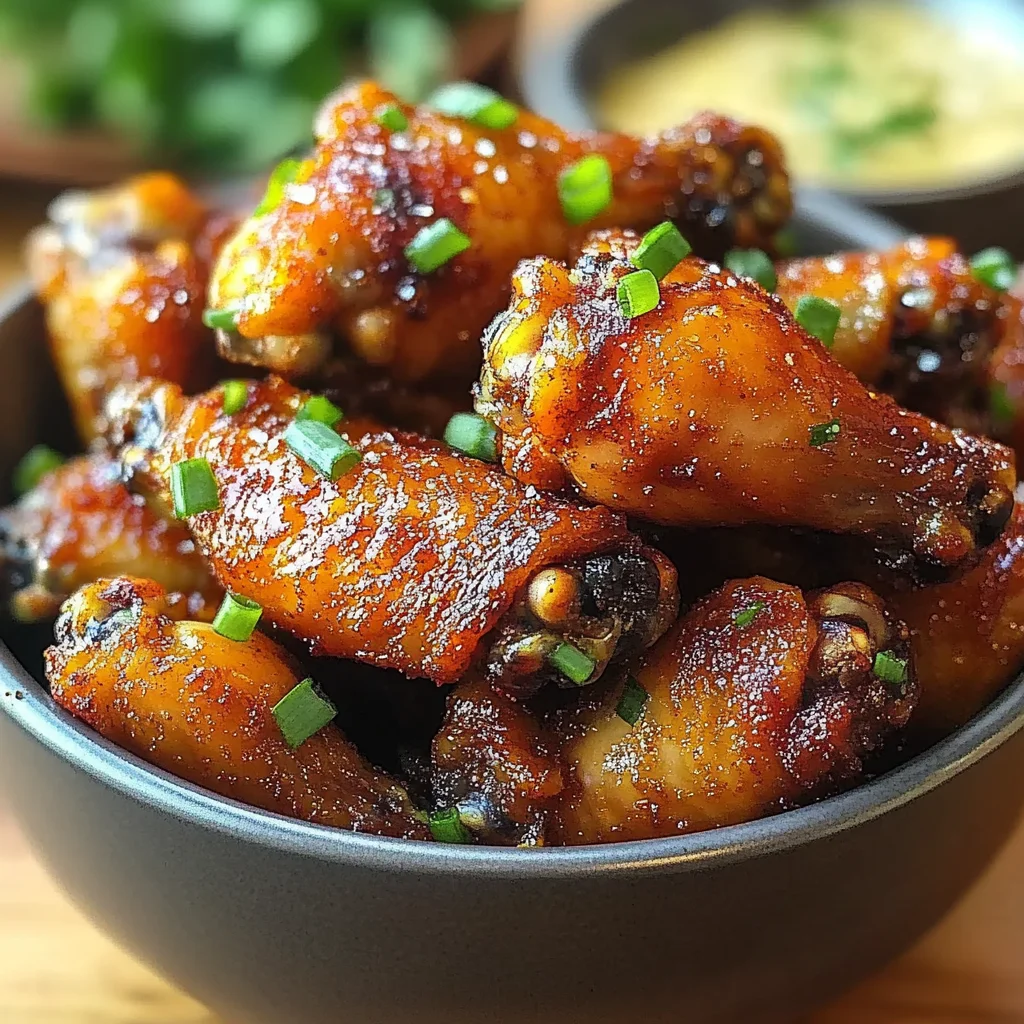
Picture this: it’s game day, a cozy movie night, or just a Tuesday when you’re craving something seriously delicious. What’s the ultimate comfort food that brings everyone together? Crispy chicken wings, of course! Forget the deep fryer mess; we’re making magic in the oven with a simple, flavorful dry rub. These wings turn out SO crispy, you’ll think they were fried, and the best part? They’re ridiculously easy. This recipe is a keeper, trust me!
Why You’ll Love This Recipe
- Fast (Ready in under an hour!)
- Easy (Minimal steps, maximum flavor!)
- Giftable (Wait, can you gift wings? Maybe the recipe!)
- Crowd-pleasing (Guaranteed to disappear!)
- Healthier (Baked, not fried!)
Ingredients
Gather ’round, friends! Here’s what you’ll need for these amazing wings:
- 2 lbs (900 g) chicken wings: Look for “party wings” already separated into flats and drumettes. If they’re whole, just grab a sharp knife and snip ’em apart at the joint!
- 1 tablespoon olive oil: Just a little drizzle helps the rub stick and the skin crisp up.
- 1 tablespoon baking powder (aluminum-free): THIS is the secret weapon for incredible crispiness! Make sure it’s aluminum-free so you don’t get a metallic taste.
- 1 teaspoon salt: Essential for bringing out all the flavors.
- 1/2 teaspoon black pepper: Freshly ground is always best!
- 1 teaspoon smoked paprika: Adds that wonderful smoky depth we all love.
- 1 teaspoon garlic powder: Because garlic makes everything better, right?
- 1/2 teaspoon onion powder: Another pantry staple flavor booster.
- 1/2 teaspoon chili powder (optional): If you like a little kick, add this in! Adjust to your spice preference.
- 1/2 teaspoon dried thyme or oregano: Either one works beautifully to add an herbal note. Use what you have!
How to Make It
Okay, let’s get cooking! These wings are surprisingly simple to whip up.
Step 1: Prep the Oven & Pan
Preheat your oven to a nice hot 425°F (220°C). This high heat is key for crispy skin. While the oven heats, grab a baking sheet and line it with foil – this makes cleanup a breeze! Place a wire rack on top of the foil-lined sheet. This allows air to circulate around the wings, helping them get crispy all over. Give the wire rack a light spray or brush with oil so the wings don’t stick.
Step 2: Dry Those Wings!
This is arguably the MOST important step for crispy skin. Use paper towels to pat the chicken wings really dry. Get into all those nooks and crannies. The drier the skin, the crispier it will get in the oven. Place the dried wings into a large bowl.
Step 3: Add a Little Olive Oil
Drizzle the tablespoon of olive oil over the dry wings in the bowl. Give them a good toss to coat them lightly and evenly. This oil helps the dry rub adhere.
Step 4: Mix the Magical Dry Rub
In a small separate bowl, combine the baking powder, salt, black pepper, smoked paprika, garlic powder, onion powder, chili powder (if you’re using it), and your choice of dried thyme or oregano. Give it a quick stir to mix everything together nicely.
Step 5: Rub ‘Em Down!
Sprinkle the dry rub mixture generously over the wings in the large bowl. Now, get in there (or use tongs!) and toss everything together until each and every wing is coated in that delicious spice blend. Make sure there are no dry spots of rub!
Step 6: Arrange for Success
Place the coated wings in a single layer on the prepared wire rack. It’s important not to crowd them! Give each wing a little space so that hot air can circulate around it. This is crucial for getting that all-around crispiness.
Step 7: Bake Until Golden & Crispy
Slide that baking sheet into the hot oven. Bake for 25 minutes. After 25 minutes, carefully flip each wing using tongs. Bake for another 20–25 minutes, or until the wings are beautifully golden brown and look seriously crispy. The exact time might vary slightly depending on your oven and wing size, so keep an eye on them!
Step 8: Rest and Serve!
Once they’re perfectly crispy, take the wings out of the oven and let them rest on the rack for just a few minutes. This helps them retain their crispiness before you devour them. Serve them hot and enjoy!
Substitutions & Additions
Want to mix things up? Here are a few ideas:
- Spice Level: Omit the chili powder for zero heat, or add a pinch of cayenne pepper for extra fire.
- Herb Swap: Try using dried rosemary or a poultry seasoning blend instead of thyme/oregano.
- Smokiness: Don’t have smoked paprika? Regular paprika works, but you’ll miss that lovely smoky note.
- Different Oil: Avocado oil or vegetable oil can be used in place of olive oil.
- Sauce It Up: While these are amazing with just the dry rub, they’re also a perfect base for tossing in your favorite sauce after baking! Think buffalo, BBQ, or a sticky Asian glaze.
Tips for Success
A few little tricks to make sure your wings are perfect every time:
- Patting Dry is Key: I cannot stress this enough! Get them as dry as possible.
- Don’t Skip the Baking Powder: Seriously, it’s the magic ingredient for crispiness without frying. It works by raising the pH level of the chicken skin, which allows it to brown and crisp more effectively.
- Use a Wire Rack: Elevating the wings ensures air circulation, making them crispy on the bottom, too!
- Single Layer is a Must: Overcrowding steams the wings instead of crisping them. Use two baking sheets if needed.
- Prep Ahead: You can pat the wings dry and toss them with the olive oil a few hours ahead of time and keep them in the fridge. Add the dry rub just before baking.
How to Store It
Got leftovers? (Highly unlikely, but just in case!)
- Fridge: Store cooled wings in an airtight container in the refrigerator for 3-4 days.
- Reheating: The best way to reheat to maintain crispiness is in the oven or an air fryer at around 375°F (190°C) until heated through, about 10-15 minutes. Microwaving works in a pinch but they won’t be crispy!
FAQs
Got questions? I’ve got answers!
- Why use baking powder? Baking powder (specifically the aluminum-free kind) is alkaline, which helps break down the protein in the chicken skin, allowing it to become extra crispy in the oven. It’s a game-changer!
- Can I use an air fryer? Absolutely! Air fryers are fantastic for crispy wings. Cook at 400°F (200°C) for 18-22 minutes, flipping halfway through, until crispy and cooked through.
- Do I need to separate the wings? Store-bought “party wings” are usually already separated. If you buy whole wings, you’ll need to cut them at the joint using a sharp knife to separate the drumette and flat. You can discard the wing tips or save them for stock.
- Can I make these spicy buffalo wings? Yes! Bake them as directed with the dry rub. Once they’re done, toss them in your favorite warmed buffalo sauce and serve immediately. The dry rub adds an extra layer of flavor under the sauce!

Crispy Baked Dry Rub Chicken Wings
Ingredients
Equipment
Method
- Step 1: Preheat oven to 425°F (220°C). Line a baking sheet with foil and place a wire rack on top. Lightly spray or brush the wire rack with oil.
- Step 2: Use paper towels to pat the chicken wings very dry. Place the dried wings into a large bowl.
- Step 3: Drizzle the tablespoon of olive oil over the dry wings in the bowl and toss to coat them lightly and evenly.
- Step 4: In a small separate bowl, combine the baking powder, salt, black pepper, smoked paprika, garlic powder, onion powder, chili powder (if using), and dried thyme or oregano. Stir to mix.
- Step 5: Sprinkle the dry rub mixture generously over the wings in the large bowl. Toss until each wing is coated.
- Step 6: Place the coated wings in a single layer on the prepared wire rack. Do not crowd them.
- Step 7: Bake for 25 minutes. Carefully flip each wing using tongs. Bake for another 20–25 minutes, or until golden brown and crispy.
- Step 8: Take the wings out of the oven and let them rest on the rack for a few minutes before serving hot.