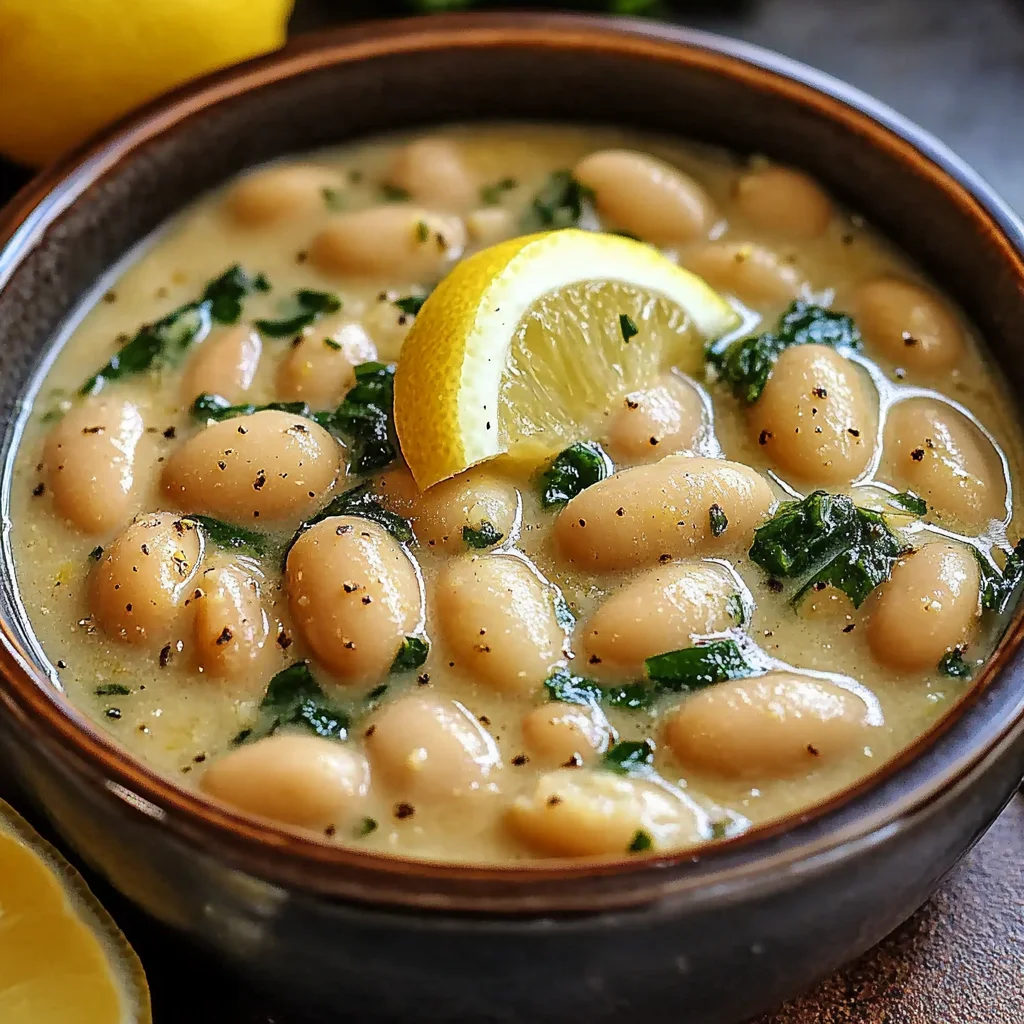
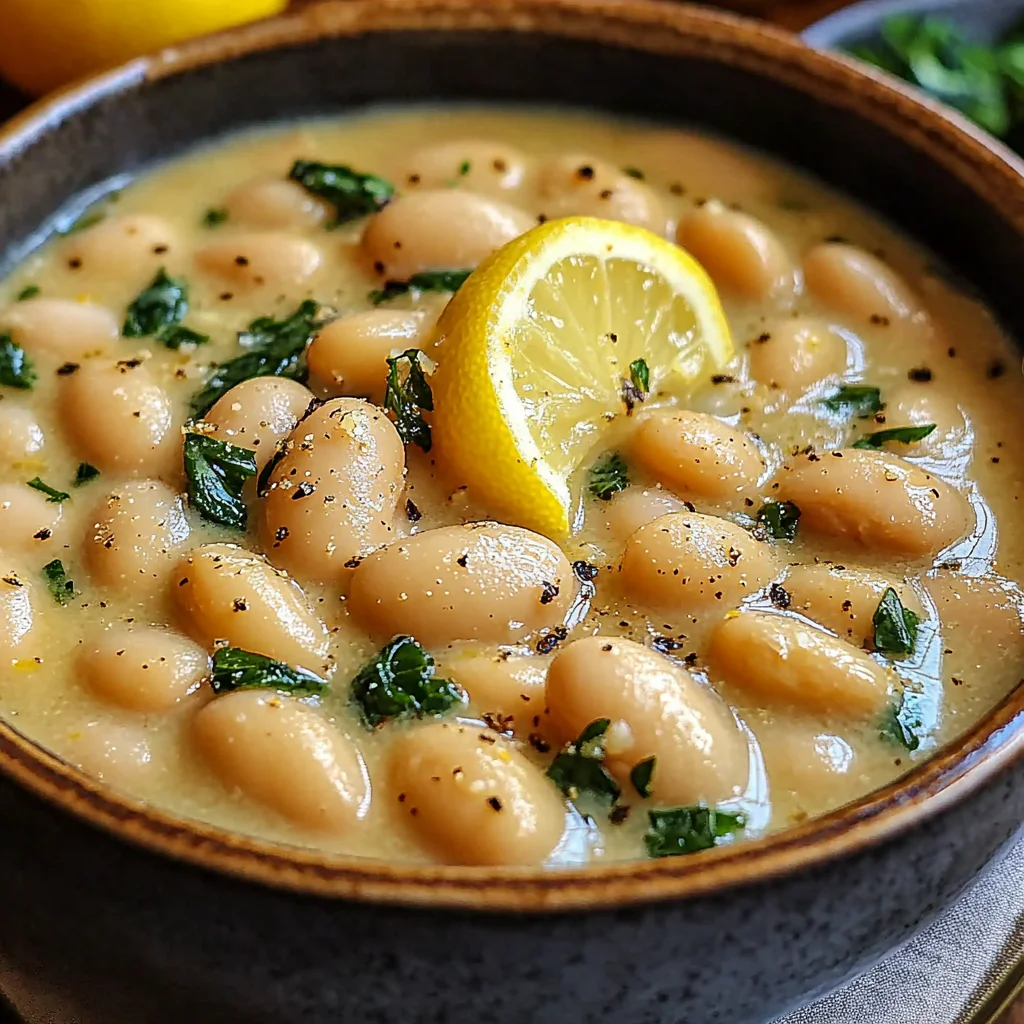
Hey there, kitchen friend! Ever have those nights when you just need something easy, comforting, and bursting with flavor to round out your meal? Something that feels a little special, but comes together in a flash? That’s exactly how I feel about humble canned beans. They’re a pantry staple workhorse, but sometimes, they just need a little… love. And this Creamy Lemon Garlic Butter Beans recipe? Oh boy, it’s more than love. It’s a full-blown glow-up for the simple butter bean, turning it into a rich, tangy, garlicky dream that you’ll want to make again and again.
Forget bland sides! This dish is so quick, so easy, and so incredibly satisfying, you might just find yourself making it even when you don’t need a side. It’s the kind of recipe that proves simple ingredients can create something truly magical.
Why You’ll Love This Recipe
- Fast: Ready in under 15 minutes! Perfect for busy weeknights.
- Easy: Just a few simple steps, no complicated techniques needed.
- Giftable: Okay, maybe not ‘giftable’ in a box, but definitely shareable! Bring this to a potluck and watch it disappear.
- Crowd-Pleasing: Seriously, who can resist creamy, garlicky, lemony goodness? It pairs with almost anything.
- Budget-Friendly: Canned beans and simple pantry staples keep costs down.
Ingredients
Gather up these simple heroes, and let’s get cooking!
- 2 cans (15 oz each) butter beans: Our star! Also known as lima beans. Using canned is our little secret for speed and convenience. Just drain and give them a good rinse.
- 2 tablespoons olive oil or plant-based butter: The base for our flavor. Use good quality olive oil, or if you prefer that buttery richness (or need to keep it vegan!), plant-based butter works beautifully.
- 3 cloves garlic: Minced, please! This is where a good chunk of our delicious flavor comes from. Don’t be shy with the garlic!
- 1/2 teaspoon chili flakes (optional): Just a little pinch adds a lovely warmth that balances the lemon. If you’re not a fan of heat, feel free to skip!
- 1/2 cup vegetable broth or water: This helps everything simmer and get happy together. Vegetable broth adds more flavor, but water works perfectly too.
- 1/2 teaspoon dried thyme or Italian herbs: Classic, earthy herbs that complement the beans and garlic beautifully. Use what you have!
- Juice and zest of 1 lemon: The bright, zesty hero that cuts through the richness and makes everything pop! Make sure to zest the lemon before you juice it – it’s much easier!
- Salt and black pepper: To taste! Don’t forget to season as you go and adjust at the end.
- 2 tablespoons fresh parsley, chopped: A sprinkle of fresh green at the end adds color and a lovely, fresh finish.
- Optional: 2 tablespoons grated Parmesan or vegan Parmesan: For that extra layer of creamy, salty goodness. If you’re keeping it vegan, make sure your plant-based butter and Parmesan are suitable!
How to Make It
Okay, let’s turn these simple ingredients into something spectacular. It’s super easy, I promise!
- Get your favorite large skillet out and set it over medium heat. Pour in your 2 tablespoons of olive oil or add your plant-based butter. Let it warm up nicely.
- Once your oil is shimmering (or butter is melted), add the 3 minced garlic cloves and the chili flakes (if you’re using them). Give it a little stir and sauté for just 1-2 minutes. You want that amazing garlic aroma to fill your kitchen, but be careful not to let it brown – burnt garlic can taste bitter. Keep an eye on it!
- Now, toss in your drained and rinsed butter beans. Pour in the 1/2 cup of vegetable broth or water and sprinkle in the 1/2 teaspoon of dried thyme or Italian herbs. Stir everything together so the beans are coated. Let it simmer gently for about 5-7 minutes. This is where the beans get warm, soften up a bit more, and really soak in all those delicious flavors.
- Here’s the secret to that creamy texture! Grab the back of a spoon or a potato masher and gently mash some of the beans right in the skillet. You don’t want to mash all of them – the goal is to break up about a quarter to a third of the beans. This releases their starch and thickens the sauce, giving you that lovely, creamy consistency while still leaving plenty of whole beans for texture.
- Remove the skillet from the heat. Stir in the juice and zest of the lemon. Give it a good mix. Now it’s time to taste and season! Add salt and black pepper until it tastes just right to you. If you’re using it, stir in the Parmesan now for extra richness.
- Finally, stir in the 2 tablespoons of chopped fresh parsley. It adds a pop of color and freshness that brightens everything up.
And that’s it! Serve your beautiful Creamy Lemon Garlic Butter Beans warm. They’re perfect alongside roasted chicken, fish, pork, or even just with some crusty bread to soak up that amazing sauce.
Substitutions & Additions
This recipe is super flexible! Feel free to play around and make it your own:
- Other Beans: While butter beans are the star for their size and creaminess, you could try cannellini beans or even chickpeas for a similar creamy texture (though chickpea mashing might be different).
- Herbs: No thyme? No problem! Use dried oregano, herbes de Provence, or swap the dried herbs for a tablespoon or two of fresh herbs like dill, chives, or more parsley stirred in at the end.
- Spicier: Love heat? Add more chili flakes, a pinch of cayenne pepper, or a dash of your favorite hot sauce.
- Richer: Swirl in a tablespoon of heavy cream or a dollop of plain yogurt (dairy or non-dairy) at the very end for an extra luscious finish.
- Veggie Boost: Sauté some finely chopped onion, shallots, or even some spinach along with the garlic.
Tips for Success
Keep these simple pointers in mind for the best results!
- Don’t Burn the Garlic! Garlic goes from fragrant to bitter very quickly. Keep the heat on medium and watch it closely. If it starts to turn golden brown, that’s usually your cue to move to the next step immediately.
- The Mashing Step is Key: Seriously, don’t skip it! It’s what transforms the broth into a lovely, creamy sauce without needing butter or cream (unless you add the optional cheese). Mash just enough to get that thickness.
- Taste and Adjust: Lemon, salt, and pepper are crucial for balancing the flavors. Taste your beans after adding the lemon and before serving, adding more seasoning as needed. Lemon can really make all the other flavors sing!
- Prep Ahead: You can mince your garlic and chop your parsley a day in advance to save time when you’re ready to cook. The dish itself is best served fresh, though!
How to Store It
If you happen to have any leftovers (a big IF!), they store quite well.
- Refrigerate: Let the beans cool completely, then transfer them to an airtight container. Store in the refrigerator for up to 3-4 days.
- Reheat: Gently warm them on the stovetop over low heat, adding a tiny splash of water or broth if they seem dry. You can also microwave them, stirring halfway through.
FAQs
Got questions? I’ve got answers!
Can I use dried butter beans instead of canned?
Yes, absolutely! You’ll need to soak and cook the dried beans according to package directions first until they are tender. Then, use the amount equivalent to two cans (usually around 3-4 cups cooked beans) and follow the rest of the recipe instructions starting with sautéing the garlic.
What should I serve this with?
This dish is incredibly versatile! It’s fantastic with roasted chicken, pan-seared fish, grilled shrimp, pork chops, or even alongside grains like quinoa or rice. It also makes a lovely vegetarian main dish served over toast or with a fried egg on top!
Is this recipe vegan?
It can easily be! Just make sure you use olive oil or plant-based butter, vegetable broth or water, and omit the optional Parmesan cheese (or use a vegan Parmesan substitute). The base recipe is naturally vegan.
Can I add other vegetables?
Definitely! This is a great base. Sautéing some finely chopped onion or shallots with the garlic is a classic addition. You could also stir in some baby spinach or kale in the last few minutes of simmering until wilted.

Creamy Lemon Garlic Butter Beans
Ingredients
Equipment
Method
- Step 1: Get your favorite large skillet out and set it over medium heat. Pour in your 2 tablespoons of olive oil or add your plant-based butter. Let it warm up nicely.
- Step 2: Once your oil is shimmering (or butter is melted), add the 3 minced garlic cloves and the chili flakes (if you're using them). Give it a little stir and sauté for just 1-2 minutes. You want that amazing garlic aroma to fill your kitchen, but be careful not to let it brown – burnt garlic can taste bitter. Keep an eye on it!
- Step 3: Now, toss in your drained and rinsed butter beans. Pour in the 1/2 cup of vegetable broth or water and sprinkle in the 1/2 teaspoon of dried thyme or Italian herbs. Stir everything together so the beans are coated. Let it simmer gently for about 5-7 minutes. This is where the beans get warm, soften up a bit more, and really soak in all those delicious flavors.
- Step 4: Here's the secret to that creamy texture! Grab the back of a spoon or a potato masher and gently mash some of the beans right in the skillet. You don't want to mash all of them – the goal is to break up about a quarter to a third of the beans. This releases their starch and thickens the sauce, giving you that lovely, creamy consistency while still leaving plenty of whole beans for texture.
- Step 5: Remove the skillet from the heat. Stir in the juice and zest of the lemon. Give it a good mix. Now it's time to taste and season! Add salt and black pepper until it tastes just right to you. If you're using it, stir in the Parmesan now for extra richness.
- Step 6: Finally, stir in the 2 tablespoons of chopped fresh parsley. It adds a pop of color and freshness that brightens everything up. And that's it! Serve your beautiful Creamy Lemon Garlic Butter Beans warm. They're perfect alongside roasted chicken, fish, pork, or even just with some crusty bread to soak up that amazing sauce.