Oh, honey, do you remember those iconic peanut butter sandwich cookies from childhood? The ones shaped like a peanut, with that unmistakably rich, creamy filling? For me, they evoke memories of lunchboxes, after-school snacks, and just pure, unadulterated joy. Well, get ready to dive headfirst into nostalgia because today, we’re making homemade Copycat Nutter Butter Cookies, and let me tell you, they are even better than the ones you remember!
This recipe is more than just a cookie; it’s a little hug for your soul. It’s surprisingly simple, incredibly quick, and yields cookies that are delightfully soft, packed with peanut butter flavor, and perfect for dunking in milk. Seriously, you won’t believe how easy it is to bring this classic treat right into your own kitchen.
Why You’ll Love Copycat Nutter Butter Cookies
- Fast: From mixing bowl to cooling rack in under 30 minutes!
- Easy: No fancy equipment or techniques needed, just simple steps.
- Giftable: Wrap these beauties up, and you’ve got a heartwarming homemade gift.
- Crowd-pleasing: Who doesn’t love a good peanut butter cookie? These disappear fast!
Ingredients
Gather your ingredients, my friend! Most of these are likely staples in your pantry right now, which makes this recipe even more delightful.
For the Cookies:
- 1/2 cup (1 stick) unsalted butter, softened: Make sure it’s nice and soft, but not melted! This helps create that fluffy texture.
- 1/2 cup creamy peanut butter: We’re going for that classic smooth Nutter Butter vibe. Save the chunky stuff for another day!
- 1/2 cup granulated sugar: For sweetness and a little crispness on the outside.
- 1/2 cup packed brown sugar: Adds a lovely depth of flavor and keeps the cookies chewy.
- 1 large egg: Our binding agent, bringing everything together.
- 1 teaspoon vanilla extract: A must for enhancing all those delicious flavors.
- 1 1/4 cups all-purpose flour: The backbone of our cookie dough.
- 3/4 teaspoon baking soda: Helps our cookies rise perfectly.
- 1/4 teaspoon salt: Balances the sweetness and brings out the peanut butter flavor.
For the Peanut Butter Filling:
- 1/2 cup creamy peanut butter: The star of our creamy, dreamy filling.
- 1/4 cup (1/2 stick) unsalted butter, softened: Again, softened is key for a smooth, easy-to-mix filling.
- 1 cup powdered sugar: This gives our filling that smooth, melt-in-your-mouth texture.
- 1 teaspoon vanilla extract: A little extra vanilla makes the filling irresistible.
- 1-2 tablespoons milk, as needed: We’ll add this slowly to get the perfect spreadable consistency.
How to Make Copycat Nutter Butter Cookies
Alright, apron on? Let’s get baking! You’re going to love how this comes together.
- Get that oven ready: First things first, preheat your oven to 350°F (175°C). While it’s warming up, grab a baking sheet and line it with parchment paper. This makes for super easy cleanup and prevents sticking.
- Cream it up: In a large mixing bowl, toss in your softened butter, that yummy creamy peanut butter, granulated sugar, and brown sugar. Beat them together with an electric mixer (or a good old sturdy spoon and some elbow grease!) until the mixture is beautifully light and fluffy. This usually takes a couple of minutes.
- Wet ingredients combine: Now, crack in your large egg and pour in that teaspoon of vanilla extract. Beat them until everything is just combined. Don’t overmix here; we want a tender cookie!
- Bring on the dry: In a separate, medium-sized bowl, quickly whisk together your all-purpose flour, baking soda, and salt. This ensures all the leavening and seasoning are evenly distributed.
- Combine it all: Gradually add the dry ingredients to your wet ingredients, mixing on low speed until a soft dough forms. Stop mixing as soon as the flour streaks disappear. Overmixing can lead to tough cookies, and we definitely don’t want that!
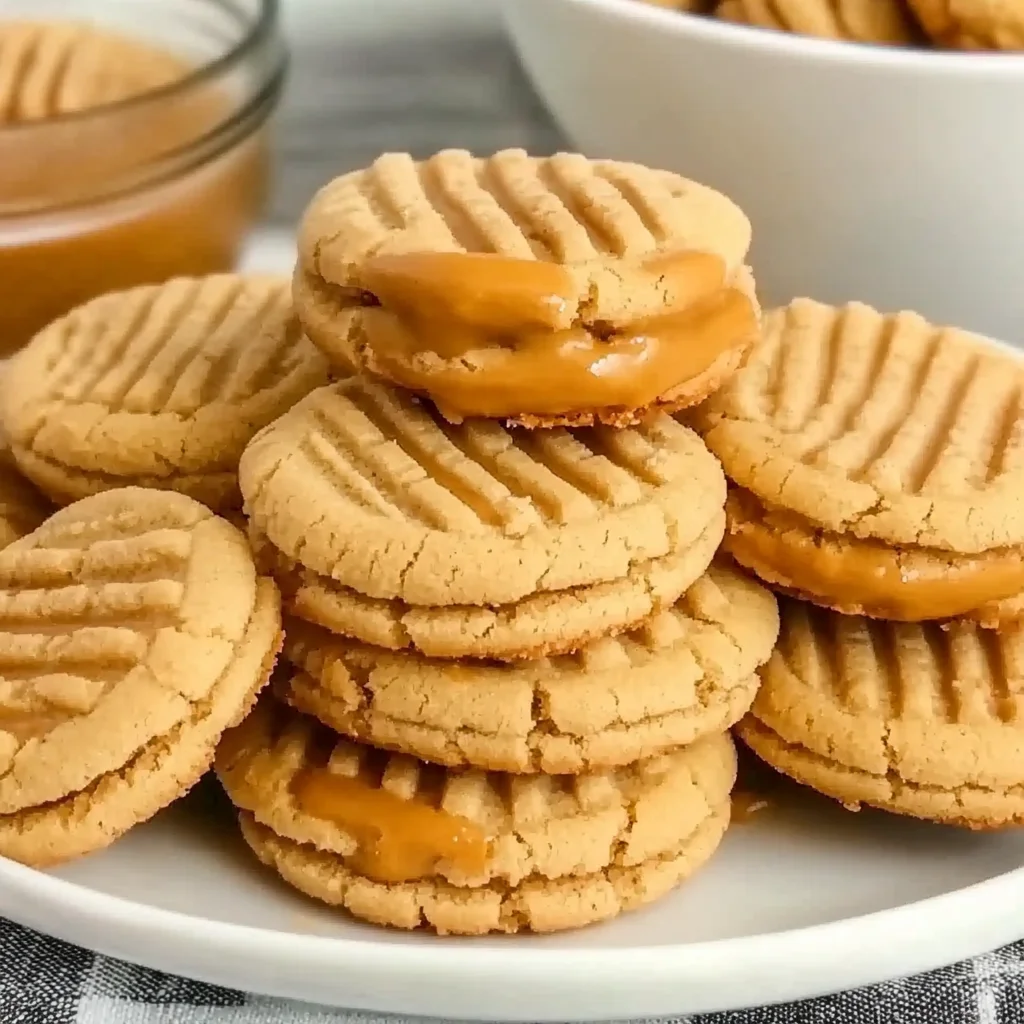
- Shape those beauties: Now for the fun part! Roll your dough into small, 1-inch balls. To get that classic Nutter Butter shape, gently press each ball into an oval and flatten it slightly. Then, take a fork and press it onto the top of each cookie, creating that signature crosshatch pattern. I like to do it twice, one way then perpendicular, to really make it stand out. Before baking, lightly sprinkle the tops with a little extra granulated sugar for a lovely sparkle and a touch of extra crunch.
- Bake to perfection: Pop your shaped cookies into the preheated oven for 8-10 minutes. Keep an eye on them! You’re looking for edges that are lightly golden. They might still look a little soft in the center, and that’s totally okay – they’ll firm up as they cool.
- Cool down: As soon as they come out of the oven, transfer your cookies to a wire rack to cool completely. Patience is a virtue here; you need them fully cooled before adding the filling.
- Whip up the filling: While your cookies are cooling, let’s make that irresistible peanut butter filling. In a medium bowl, beat together the creamy peanut butter and softened butter until it’s wonderfully smooth. Add in the powdered sugar and vanilla extract, and mix until it’s creamy and well combined.
- Get the right consistency: Now, for the milk! Add it one tablespoon at a time, mixing after each addition, until you reach your desired spreadable consistency. You want it smooth enough to spread or pipe, but firm enough to hold its shape.
- Assemble your sandwiches: Once your cookies are completely cool (this is important!), grab one cookie and spread or pipe a generous amount of that creamy peanut butter filling onto its flat side. Then, gently top it with another cookie, pressing down slightly to create a delicious peanut butter sandwich. Repeat until all your cookies are paired up!

Substitutions & Additions
Part of the joy of baking is making a recipe your own! Here are some ideas to shake things up:
- Crunchy Peanut Butter: While the classic Nutter Butter is smooth, if you adore a bit of texture, go ahead and swap in crunchy peanut butter for both the cookies and the filling. It’ll be a delightful twist!
- Chocolate Drizzle: Take these over the top by melting some semi-sweet or milk chocolate and drizzling it over the finished sandwich cookies. It’s a classic combo for a reason!
- Mini Chocolate Chips: Fold a handful of mini chocolate chips into the cookie dough for a peanut butter chocolate chip cookie mashup.
- Espresso Powder: A tiny pinch (1/4 teaspoon) of espresso powder in the cookie dough can deepen the chocolate flavor without making it taste like coffee.
- Different Extracts: Try swapping out half the vanilla extract for almond extract in either the cookies or the filling for a slightly different flavor profile.
Tips for Success
Making these cookies is a breeze, but a few little pointers can make them absolutely perfect!
- Room Temperature Butter is Key: Seriously, this makes all the difference for a smooth, well-incorporated dough and filling. If your butter isn’t soft enough, it won’t cream properly.
- Don’t Overmix the Dough: Once you add the flour, mix just until combined. Overmixing develops the gluten in the flour, leading to tougher cookies.
- Cool Completely: I know it’s hard to wait, but your cookies MUST be fully cooled before you add the filling. Otherwise, the filling will melt and slide right off.
- Achieving the Perfect Filling Consistency: Add the milk to the filling slowly, a tablespoon at a time. You want it easily spreadable but not runny. If you accidentally add too much, you can try adding a bit more powdered sugar to thicken it up.
- For Uniformity: If you want all your cookies to be the exact same size, use a small cookie scoop for the dough balls.
- Prep Ahead: You can make the cookie dough ahead of time! Wrap it tightly in plastic wrap and store it in the refrigerator for up to 3 days. Let it come to room temperature for about 15-20 minutes before rolling and shaping. You can also make a big batch and package them up for friends, just like you would a batch of delicious chocolate chip cookie twists.
How to Store Copycat Nutter Butter Cookies
If these incredible cookies last longer than a day (which is a big “if” in my house!), here’s how to keep them fresh:
- Airtight Container: Store your assembled cookies in an airtight container at room temperature for up to 5-7 days.
- Refrigeration: If you prefer a firmer cookie or live in a very warm climate, you can store them in the refrigerator. They’ll last a bit longer, usually about 10 days.
- Freezing: These cookies freeze beautifully! You can freeze the baked cookies before filling them for up to 3 months. Let them thaw and then fill. You can also freeze the assembled sandwich cookies in a single layer in an airtight container for up to 1 month. Thaw at room temperature or in the fridge before enjoying.
FAQs
Got questions? I’ve got answers!
Q: Can I use natural peanut butter for this recipe?
A: I don’t recommend natural peanut butter (the kind that separates) for this recipe, especially for the filling. Its oil content and consistency are very different, and it can make the cookies spread too much and the filling too greasy or thin. Stick to the creamy, processed kind for that authentic Nutter Butter taste and texture.
Q: My cookies spread too much! What happened?
A: A few things could cause this! Your butter might have been too warm or melted, you might have overmixed the dough, or your oven temperature could be off. Ensure your butter is just softened (not oily), and measure your ingredients precisely, especially the flour. Chilling the dough for 15-20 minutes before shaping can also help prevent spreading.
Q: How can I make these cookies even more like the store-bought Nutter Butters?
A: The key is in the shape! Using a peanut-shaped cookie cutter would be the ultimate way to mimic the iconic look. Otherwise, really focus on forming those oval shapes and distinct fork marks. And if you’re feeling adventurous and love a good no-bake option, you absolutely have to try our easy no-bake Reese’s Peanut Butter Bars for another fantastic peanut butter fix!
Q: Can I double this recipe?
A: Absolutely! This recipe doubles very well. Just make sure you have enough baking sheets and space for all those delicious cookies!
I hope you have the best time making these nostalgic Copycat Nutter Butter Cookies. They’re truly a labor of love that pays off in every single bite!
For more delicious recipes and kitchen inspiration, follow us on Pinterest!

Easy Homemade Copycat Nutter Butter Cookies
Ingredients
Equipment
Method
- Step 1: Get oven ready. Preheat your oven to 350°F (175°C). Line a baking sheet with parchment paper.
- Step 2: Cream wet ingredients. In a large mixing bowl, beat softened butter, creamy peanut butter, granulated sugar, and brown sugar together with an electric mixer until the mixture is light and fluffy (about a couple of minutes).
- Step 3: Add egg and vanilla. Crack in the large egg and pour in the vanilla extract. Beat until everything is just combined, avoiding overmixing.
- Step 4: Whisk dry ingredients. In a separate, medium-sized bowl, whisk together the all-purpose flour, baking soda, and salt to ensure even distribution.
- Step 5: Combine dough. Gradually add the dry ingredients to your wet ingredients, mixing on low speed until a soft dough forms and flour streaks disappear. Stop mixing as soon as combined to prevent tough cookies.
- Step 6: Shape and decorate. Roll the dough into small, 1-inch balls. Gently press each ball into an oval and flatten it slightly. Take a fork and press it onto the top of each cookie twice (once, then perpendicularly) to create the signature crosshatch pattern. Lightly sprinkle the tops with a little extra granulated sugar for sparkle and crunch.
- Step 7: Bake cookies. Pop your shaped cookies into the preheated oven for 8-10 minutes, until the edges are lightly golden. They might still look a little soft in the center.
- Step 8: Cool completely. As soon as they come out of the oven, transfer your cookies to a wire rack to cool completely. They must be fully cooled before adding the filling.
- Step 9: Prepare filling. While your cookies are cooling, make the peanut butter filling. In a medium bowl, beat together the creamy peanut butter and softened butter until wonderfully smooth. Add in the powdered sugar and vanilla extract, mixing until creamy and well combined.
- Step 10: Adjust filling consistency. Add 1-2 tablespoons of milk, one tablespoon at a time, mixing after each addition, until you reach your desired spreadable consistency (smooth but firm enough to hold its shape).
- Step 11: Assemble sandwiches. Once your cookies are completely cool, grab one cookie and spread or pipe a generous amount of the creamy peanut butter filling onto its flat side. Gently top it with another cookie, pressing down slightly to create a delicious peanut butter sandwich. Repeat until all your cookies are paired up.