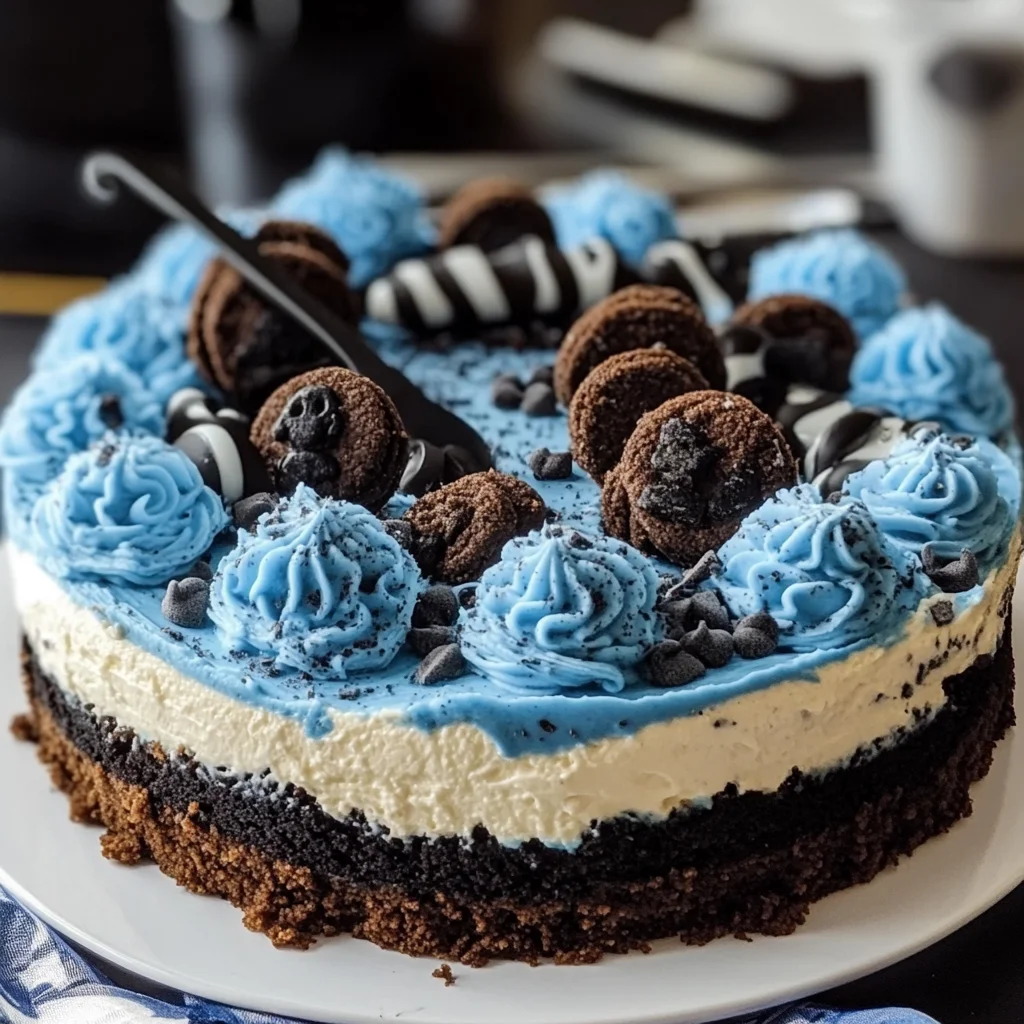
Remember those carefree days when Cookie Monster was your favorite blue fuzzy friend, devouring cookies with such joy and enthusiasm? That same playful spirit inspired this delightful Cookie Monster No-Bake Cheesecake—a dessert that’s as fun to make as it is to eat. Whether you’re making it for a kid’s birthday party, a family gathering, or just a cozy night in, this cheesecake brings a nostalgic smile to anyone who loves cookies and creamy treats.
What’s even better? This recipe is super easy and fast to whip up—no oven needed! It’s perfect if you want a show-stopping dessert without the fuss, and it’s guaranteed to be a crowd-pleaser. I often make it when I want something impressive yet simple, especially during warmer months when firing up the oven isn’t ideal. Plus, it’s a fantastic gift idea—everyone loves a slice (or two) of cookie-filled cheesecake magic!
Why You’ll Love Cookie Monster No-Bake Cheesecake
- Fast: No baking means less time in the kitchen and more time enjoying your creation.
- Easy: With straightforward steps and simple ingredients, even beginner bakers will shine.
- Giftable: Make it in a springform pan and share it as a unique, homemade sweet treat.
- Crowd-pleasing: The combo of Oreos, mini cookies, and creamy cheesecake appeals to all ages.
Ingredients
Here’s what you’ll need to bring this cookie monster to life. Each ingredient plays a key role in creating that luscious, creamy texture with crunchy cookie surprises.
- 24 Oreo cookies, crushed: These form the classic chocolate cookie crust, rich and perfect for pressing into the pan.
- 5 tablespoons unsalted butter, melted: Binds the crust together and adds richness.
- 16 oz cream cheese, softened: The creamy base of your cheesecake, it’s important to have it softened for smooth mixing.
- 1 cup granulated sugar: Sweetens the filling just right without overpowering.
- 2 teaspoons vanilla extract: Adds warmth and depth to the flavor.
- 2 cups heavy whipping cream, whipped to stiff peaks: Lightens the cheesecake and adds that fluffy, dreamy texture.
- 1 packet unflavored gelatin: Helps the cheesecake set without baking.
- ¼ cup cold water (for blooming gelatin): Essential for dissolving the gelatin properly.
- Blue food coloring (gel or liquid), as desired: For that signature Cookie Monster blue hue—go as vibrant as you like!
- 1½ cups mini chocolate chip cookies, chopped: Adds delightful cookie crunch inside the cheesecake.
- 1½ cups mini Oreos, chopped: More cookie goodness throughout the creamy filling.
- Additional mini cookies, mini Oreos, chocolate chips, and edible googly eyes (for garnish): These fun decorations bring Cookie Monster to life and make your cheesecake irresistibly cute.
How to Make Cookie Monster No-Bake Cheesecake
Ready to get started? I’ll walk you through every step so your cheesecake turns out perfect, creamy, and full of cookie crunch.
- Prepare the crust: Crush the Oreo cookies into fine crumbs. I usually pop them into a ziplock bag and give them a good roll with a rolling pin. You can also use a food processor if you have one—it makes crumbs super fine and easy to work with. Mix the crumbs with the melted butter until everything is evenly coated. Press this mixture firmly into the bottom of a 9-inch springform pan. Pop it into the fridge to chill while you prepare the filling. This chilled crust will hold together beautifully once set.
- Whip the heavy cream: Use a cold bowl and cold beaters if possible—this helps the cream whip faster and hold stiff peaks better. Whip until you see sharp peaks that stand tall when you lift the beaters. Set this aside for now.
- Bloom and dissolve the gelatin: Sprinkle the gelatin over the cold water and let it sit for 5 minutes. This “blooming” step is crucial for the gelatin to absorb water and dissolve properly. After 5 minutes, microwave it for 10-15 seconds until fully dissolved—no lumps! Let it cool slightly but don’t let it firm up.
- Mix the cream cheese filling: In a large bowl, beat the softened cream cheese, sugar, and vanilla extract until smooth and creamy. Gradually add the cooled gelatin, mixing well to incorporate. This is the base that will hold your cheesecake together without baking.
- Add the blue color: Stir in your blue food coloring until you get that perfect Cookie Monster shade. I love using gel coloring because it’s more vibrant and doesn’t thin out the mixture.
- Fold in the whipped cream: Gently fold the whipped cream into the cream cheese mixture. The goal here is to keep it light and airy, so use a spatula and fold carefully until just combined.
- Add the cookie mix-ins: Fold in the chopped mini chocolate chip cookies and mini Oreos. These little bits add amazing texture and surprise in every bite.
- Assemble and chill: Pour the filling over the chilled crust and spread it evenly. Cover the pan with plastic wrap and refrigerate for at least 6 hours, or better yet, overnight to let it set perfectly.
- Garnish and serve: Before serving, decorate the top with extra mini cookies, Oreos, chocolate chips, and those adorable edible googly eyes to really capture Cookie Monster’s playful spirit. It’s such a fun final touch that always gets compliments!
If you’re a fan of no-bake desserts, you might also enjoy the No-Bake Oreo Bars, which are another fantastic treat that’s quick and simple to prepare.
Substitutions & Additions
One of the best parts about this cheesecake is how easy it is to customize. Here are a few ideas to make this dessert your own or to accommodate what you have on hand:
- Cookie crust swap: Instead of Oreos, try chocolate graham crackers or even a mix of chocolate chip cookies crushed up for the crust. It’s a great way to play with flavors!
- Gelatin alternative: If you prefer not to use gelatin, agar-agar powder is a vegan substitute. Just follow the package instructions for blooming and dissolving.
- Flavor twists: Add a tablespoon of lemon juice or orange zest to the cream cheese for a subtle citrusy zing that pairs wonderfully with the cookies.
- Extra mix-ins: You can toss in mini M&M’s, chopped nuts, or even crushed candy bars to amp up the texture and flavor.
- Blueberry boost: For a fruity twist, swirl in some blueberry jam or fresh blueberries for a burst of fresh flavor that complements the creamy filling.
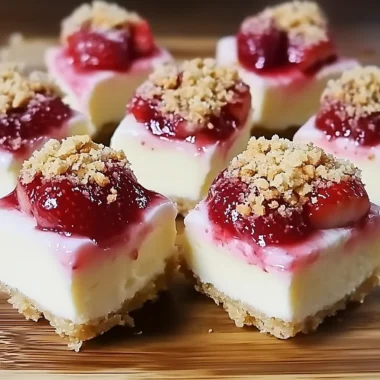
For a fun twist on cookie desserts, check out these Strawberry Cheesecake Cookies that combine fruity sweetness with creamy cheesecake goodness.
Tips for Success
Here are some helpful tips from my kitchen to yours to make sure your Cookie Monster No-Bake Cheesecake turns out flawless every time:
- Softened cream cheese is key: Let your cream cheese sit out for at least 30 minutes before mixing. This prevents lumps and helps you get that silky smooth filling.
- Whip cream properly: Don’t rush the whipping process. Stiff peaks hold the cheesecake light and fluffy and help it set nicely.
- Don’t skip blooming gelatin: This step ensures your cheesecake won’t be runny. Bloom the gelatin and only add it when it’s dissolved and cooled slightly.
- Press crust firmly: Use the bottom of a glass or measuring cup to press the crust evenly and tightly into the pan. This creates a sturdy base that won’t crumble when sliced.
- Chill long enough: Patience is a virtue here! The longer you refrigerate (overnight is best), the better the texture and easier it is to slice.
- Prep ahead: This cheesecake is perfect to make a day in advance. It frees you up on the day of your event and the flavors meld beautifully overnight.
How to Store Cookie Monster No-Bake Cheesecake
After all your hard work, you want to keep your cheesecake fresh and delicious. Here’s how to do it:
- Refrigerate: Keep the cheesecake covered tightly with plastic wrap or store it in an airtight container. It will stay fresh for up to 4-5 days in the fridge.
- Freeze: You can freeze this cheesecake for up to 1 month. Wrap it well in plastic wrap and foil to prevent freezer burn. Thaw overnight in the fridge before serving.
- Serving tip: For clean slices, run a sharp knife under hot water and wipe it dry before each cut. This helps create neat, beautiful portions with every slice.
FAQs
Can I use low-fat cream cheese or whipped cream?
For the best texture and flavor, full-fat cream cheese and heavy whipping cream are recommended. Low-fat versions may affect the richness and how well the cheesecake sets.
What if I don’t have a springform pan?
You can use a regular 9-inch cake pan, but line it with parchment paper and use a removable base if possible. Otherwise, the crust and cheesecake might be more challenging to remove cleanly.
Can I make this cheesecake without gelatin?
Gelatin helps the cheesecake set without baking. If you want to skip it, you can try using cream cheese and whipped cream alone, but the cheesecake will be softer and may not hold its shape as well.
How do I make the blue color vibrant?
Gel food coloring works best for vibrant color without thinning the mixture. Add it slowly until you get the perfect shade of Cookie Monster blue.
If you love quick and fun desserts like this, you might also want to check out the easy-to-make no-bake caramel pretzel bars. They’re another crowd favorite that’s just as simple to throw together!
Making this Cookie Monster No-Bake Cheesecake is like reliving a sweet childhood memory, with each bite bringing joy and a little nostalgia. It’s simple, fun, and absolutely delicious — perfect for sharing with friends and family or indulging in your own cookie-filled fantasy.
So go ahead, gather your ingredients, and bring a bit of that cookie-loving magic into your kitchen today!
Don’t forget to follow us on Pinterest for more delightful recipes and kitchen inspiration!

Cookie Monster No-Bake Cheesecake
Ingredients
Equipment
Method
- Step 1: Crush the Oreo cookies into fine crumbs using a ziplock bag and rolling pin or a food processor. Mix with melted butter and press firmly into the bottom of a 9-inch springform pan. Refrigerate to chill.
- Step 2: Whip the heavy cream in a cold bowl with cold beaters until stiff peaks form. Set aside.
- Step 3: Bloom gelatin by sprinkling it over cold water and letting it sit for 5 minutes. Microwave for 10-15 seconds until dissolved. Let cool slightly.
- Step 4: Beat softened cream cheese, sugar, and vanilla extract until smooth. Gradually add cooled gelatin and mix well.
- Step 5: Stir in blue food coloring until desired shade is reached.
- Step 6: Gently fold whipped cream into cream cheese mixture until just combined.
- Step 7: Fold in chopped mini chocolate chip cookies and mini Oreos.
- Step 8: Pour filling over chilled crust, spread evenly, cover with plastic wrap, and refrigerate at least 6 hours or overnight to set.
- Step 9: Garnish with additional mini cookies, Oreos, chocolate chips, and edible googly eyes before serving.