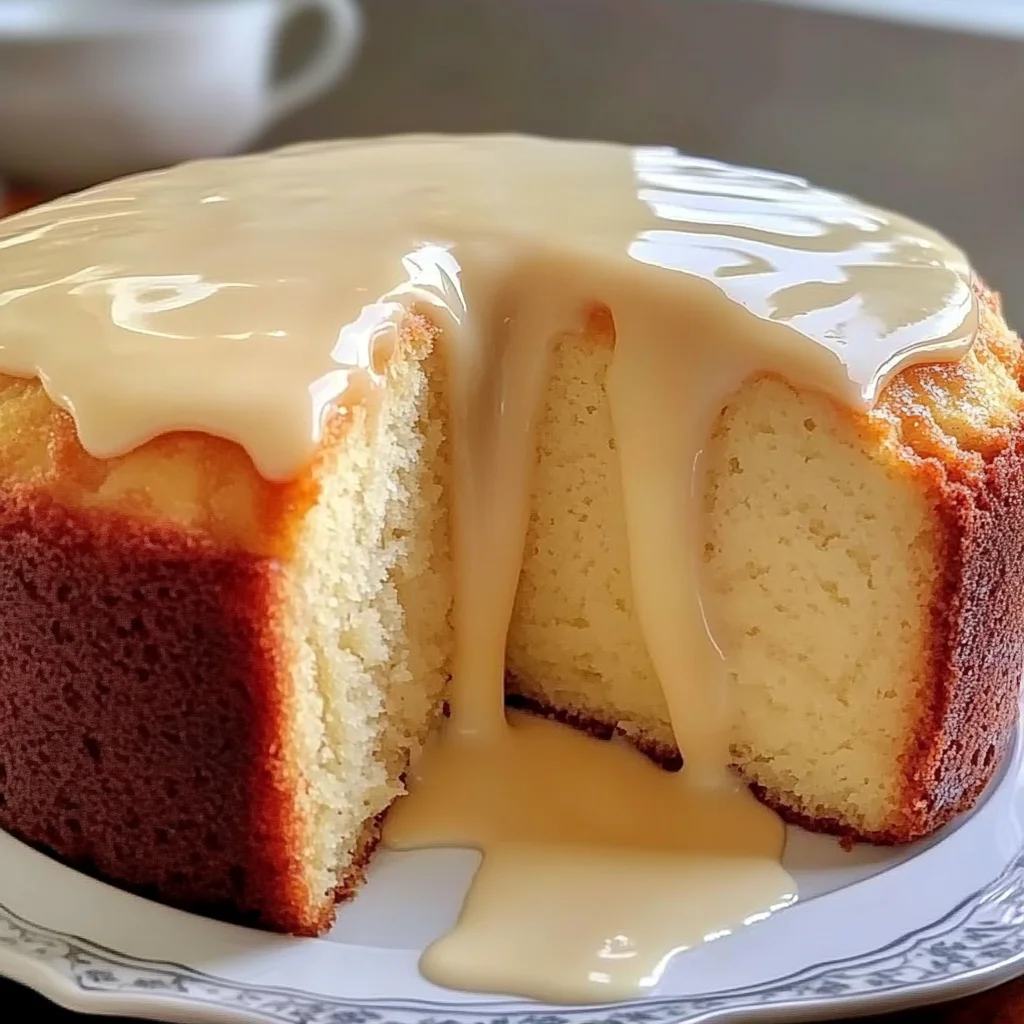
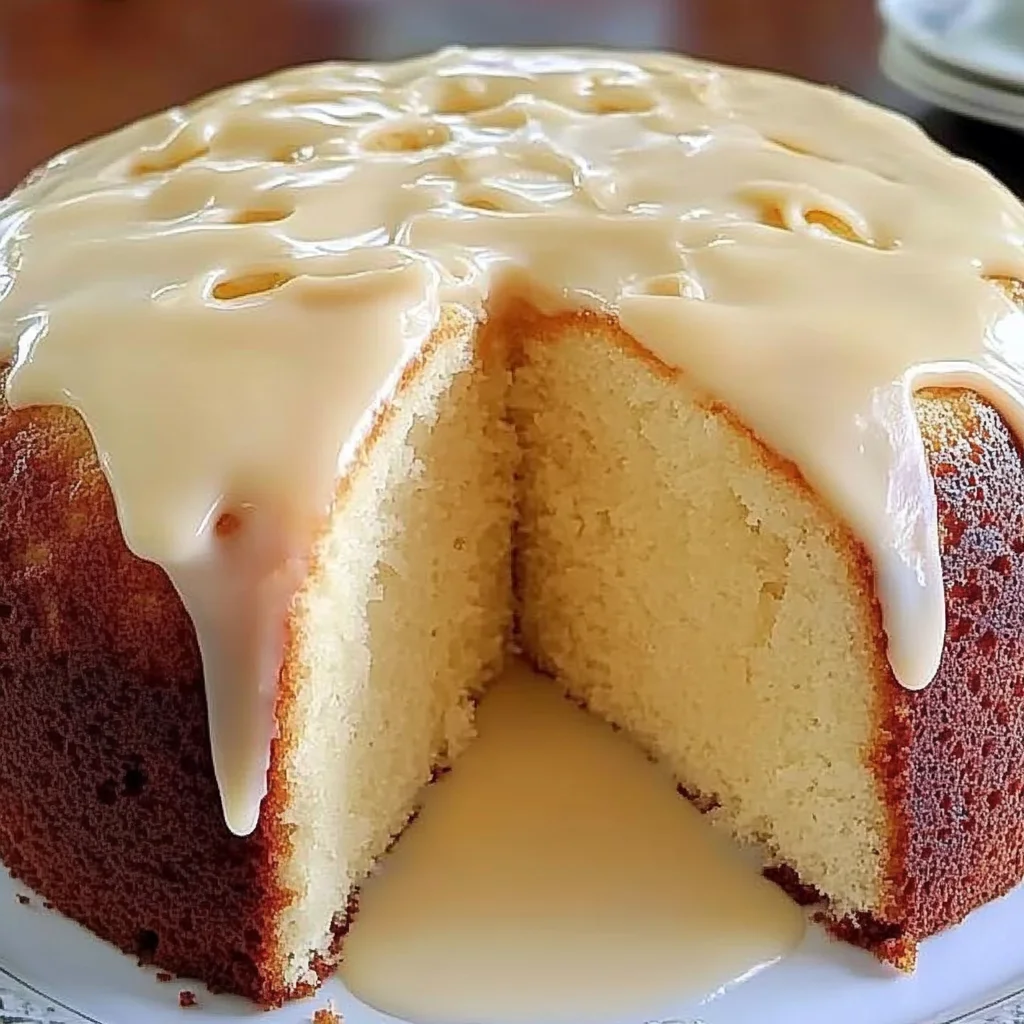
Oh, honey. There are just some smells that bring you right back home, aren’t there? For me, it’s often the scent of a simple, perfect pound cake baking in the oven. It’s not fancy, it doesn’t need a million layers or complicated fillings. It’s just pure, buttery, vanilla comfort. This Vanilla Buttermilk Pound Cake recipe is exactly that – a slice of pure nostalgia, easy enough for a lazy Sunday afternoon but impressive enough for any gathering. With a tender crumb and that irresistible tangy cream cheese glaze, it’s destined to become a go-to in your kitchen, just like it is in mine.
Why You’ll Love This Recipe
Seriously, what’s not to love? This cake hits all the sweet spots:
- Fast(ish!): Okay, maybe not instant, but for a classic pound cake, the prep is straightforward and doesn’t take all day. The baking time is the longest part, perfect for filling your home with amazing smells!
- Easy: No fancy techniques here. If you can mix, you can make this cake.
- Giftable: Wrap up a cooled cake (glazed or unglazed) and you’ve got the most thoughtful, delicious gift for a friend or neighbor.
- Crowd-pleasing: I’ve never met anyone who said no to a slice of perfectly moist pound cake with a sweet, tangy glaze. It just makes people happy!
Ingredients
Here’s what you’ll need to whip up this delightful cake. Most of these are likely already in your pantry!
For the Cake:
- 2 3/4 cups all-purpose flour: The backbone of our cake. Make sure it’s fresh!
- 1/2 teaspoon baking powder: Just a little lift to make sure it’s not too dense.
- 1/4 teaspoon baking soda: This reacts with the buttermilk for extra tenderness.
- 1/2 teaspoon salt: Balances out all that sweetness. Don’t skip it!
- 1 cup (2 sticks) unsalted butter, softened: Room temperature is key here! Not melty, just soft enough to easily press your finger into.
- 2 1/4 cups granulated sugar: Gives us that classic pound cake sweetness and helps with moisture.
- 4 large eggs: Also at room temperature! They incorporate better and give a richer cake.
- 1 teaspoon vanilla extract: Use the good stuff if you have it – it makes a difference!
- 1 cup buttermilk: This is the secret ingredient for that lovely tang and super moist crumb.
For the Cream Cheese Glaze:
- 4 ounces cream cheese, softened: Take it out of the fridge ahead of time!
- 1 cup powdered sugar, sifted: Sifting prevents lumps in your glaze.
- 2-3 tablespoons milk (adjust for consistency): Any milk works! Start with less and add until it’s just right for drizzling.
- 1/2 teaspoon vanilla extract: More vanilla goodness!
How to Make It
Let’s get baking! Follow these steps, and you’ll have a beautiful cake in no time.
-
Get Ready to Bake:
First things first, preheat that oven to 325°F (160°C). Lower and slower is the key to a perfectly baked pound cake center. Then, grab your 10-cup bundt pan. Greasing and flouring is the traditional way, but honestly, a good quality nonstick baking spray (the kind with flour in it) is my go-to. Make sure you get into all those nooks and crannies so your beautiful cake releases cleanly!
-
Whip Up the Batter:
In a medium bowl, sift together your dry ingredients: the flour, baking powder, baking soda, and salt. Give it a little whisk to combine, then set it aside. Now, in a large bowl (or the bowl of your stand mixer), beat the softened butter and granulated sugar together on medium speed. Let it go for about 3-4 minutes until it’s light and fluffy and pale yellow. This creaming step is super important for the cake’s texture! Add those room temperature eggs one at a time, beating well after each addition until fully incorporated. Scrape down the sides as needed. Stir in the vanilla extract.
Now, for the fun part: adding the dry and wet ingredients. You’ll alternate between the flour mixture and the buttermilk. Start with about a third of the flour mixture, mixing on low speed just until barely combined. Then add half the buttermilk, mix just until combined. Follow with another third of the flour, then the rest of the buttermilk, and finally, the last of the flour. Remember to start and end with the flour mixture! Be careful not to overmix at this stage – mix only until you no longer see streaks of dry ingredients. Overmixing can make your cake tough.
-
Bake That Beauty:
Pour the gorgeous batter evenly into your prepared bundt pan. Use a spatula to smooth the top. Pop it into the preheated oven. It will need about 70-80 minutes to bake. The best way to check if it’s done is to insert a long wooden skewer or toothpick into the center of the cake (avoiding the tunnel in the middle of the bundt pan). It should come out clean or with just a few moist crumbs attached. If it comes out with wet batter, give it a few more minutes and test again. If the top starts browning too much before the inside is done, you can lightly tent it with foil.
Once it’s baked, take the cake out of the oven and let it cool in the pan on a wire rack for 10-15 minutes. This allows the cake to firm up slightly before you flip it. After 10-15 minutes, carefully invert the pan onto the wire rack. If you greased well, it should slide right out! Let the cake cool completely on the wire rack before even thinking about glazing it. Glazing a warm cake will just cause the glaze to melt and run everywhere!
-
Whip Up the Glaze:
While the cake cools (or right before you’re ready to glaze), make the cream cheese glaze. In a mixing bowl, beat the softened cream cheese until it’s smooth and creamy – no lumps! Gradually add the sifted powdered sugar, mixing on low speed until it’s all incorporated. Stir in the vanilla extract. Now, add the milk, one tablespoon at a time, mixing until you get a pourable consistency. You might need 2 tablespoons, you might need 3. It depends on how thick or thin you like your glaze!
-
Glaze and Serve:
Once the cake is completely cool, place the wire rack over a baking sheet or some parchment paper to catch any drips (easy cleanup!). Drizzle that delicious cream cheese glaze all over the top of the cake, letting it drip down the sides. Let the glaze set for just a few minutes, then slice and enjoy! This cake is perfect on its own, or with a scoop of vanilla ice cream and fresh berries.
Substitutions & Additions
Want to mix things up? This recipe is pretty forgiving and open to delicious variations!
- Citrus Twist: Add the zest of one lemon or orange to the batter along with the vanilla for a bright, zesty flavor. Lemon-Buttermilk Pound Cake is divine!
- Almond Lover?: Swap out the vanilla extract for almond extract, or use half vanilla and half almond.
- Chocolate Chip Swirl: Fold in 1/2 cup of mini chocolate chips into the batter just before pouring into the pan.
- Nutty Crunch: Add 1/2 cup of chopped pecans or walnuts to the batter.
- Different Glaze: Not a fan of cream cheese? Make a simple vanilla glaze by whisking together 1 1/2 cups powdered sugar with 2-3 tablespoons milk and 1/2 teaspoon vanilla extract until smooth.
Tips for Success
A few little pointers to ensure your pound cake turns out perfectly every time:
- Room Temperature Ingredients: I mentioned this before, but it’s worth repeating! Butter, eggs, and buttermilk should all be at room temperature. This helps them emulsify properly, resulting in a smoother batter and a better textured cake.
- Measure Your Flour Correctly: Don’t scoop the flour directly from the bag with your measuring cup – this compacts it! Spoon the flour into your measuring cup and then level it off with a straight edge.
- Do Not Overmix: Once you start adding the dry and wet ingredients, mix just until everything is combined. Overmixing develops the gluten in the flour and can make your cake tough and dry.
- Grease Your Pan Generously: Nothing is more heartbreaking than a beautiful cake that sticks! Use butter and flour, or a good quality nonstick baking spray specifically for baking. Get into all the nooks and crannies of your bundt pan.
- Oven Calibration: Ovens can be finicky! If you suspect your oven runs hot or cold, using an oven thermometer can be super helpful.
- Cool Completely Before Glazing: Patience is a virtue here! Make sure the cake is totally cool before adding the glaze, or it will just melt off.
How to Store It
Once glazed, this cake is best stored at room temperature for a day or two. Place it in an airtight cake carrier or cover loosely with plastic wrap once the glaze is set. Due to the cream cheese glaze, if you’re keeping it longer than 2 days, or if your kitchen is very warm, it’s best to store it in the refrigerator. Let it come back to room temperature for about 30 minutes before serving for the best texture.
To store for longer, you can wrap individual slices or the whole cake (without the glaze) tightly in plastic wrap, then in foil, and freeze for up to 3 months. Thaw at room temperature. You can make the glaze fresh when you’re ready to serve.
FAQs
Got questions? I’ve got (short) answers!
Q: Why is it called “Pound Cake”?
A: Traditionally, pound cake recipes called for a pound each of butter, sugar, eggs, and flour! This recipe is slightly adapted but still has that rich, dense (but not heavy!) texture characteristic of a classic pound cake.
Q: Can I use regular milk instead of buttermilk?
A: Buttermilk really does make a difference in texture and flavor. If you don’t have buttermilk, you can make a substitute: add 1 tablespoon of lemon juice or white vinegar to a liquid measuring cup, then add enough milk (any kind except maybe heavy cream) to equal 1 cup. Let it sit for 5-10 minutes until it looks slightly curdled. Stir and use as directed.
Q: My cake stuck to the bundt pan! What went wrong?
A: Oh no! Usually, this means the pan wasn’t greased and floured really well. Make sure you get into every single detail of the pan, or use a high-quality nonstick baking spray with flour.
Q: Can I bake this in a loaf pan?
A: Yes, you can! This recipe would likely make two standard loaf pans (9×5 inches). You’ll need to reduce the baking time significantly – start checking around 50-60 minutes. Bake until a toothpick inserted in the center comes out clean.

Classic Vanilla Buttermilk Pound Cake with Cream Cheese Glaze
Ingredients
Equipment
Method
- Step 1: Get Ready to Bake: First things first, preheat that oven to 325°F (160°C). Lower and slower is the key to a perfectly baked pound cake center. Then, grab your 10-cup bundt pan. Greasing and flouring is the traditional way, but honestly, a good quality nonstick baking spray (the kind with flour in it) is my go-to. Make sure you get into all those nooks and crannies so your beautiful cake releases cleanly!
- Step 2: Whip Up the Batter: In a medium bowl, sift together your dry ingredients: the flour, baking powder, baking soda, and salt. Give it a little whisk to combine, then set it aside. Now, in a large bowl (or the bowl of your stand mixer), beat the softened butter and granulated sugar together on medium speed. Let it go for about 3-4 minutes until it's light and fluffy and pale yellow. This creaming step is super important for the cake's texture! Add those room temperature eggs one at a time, beating well after each addition until fully incorporated. Scrape down the sides as needed. Stir in the vanilla extract. Now, for the fun part: adding the dry and wet ingredients. You'll alternate between the flour mixture and the buttermilk. Start with about a third of the flour mixture, mixing on low speed just until barely combined. Then add half the buttermilk, mix just until combined. Follow with another third of the flour, then the rest of the buttermilk, and finally, the last of the flour. Remember to start and end with the flour mixture! Be careful not to overmix at this stage – mix only until you no longer see streaks of dry ingredients. Overmixing can make your cake tough.
- Step 3: Bake That Beauty: Pour the gorgeous batter evenly into your prepared bundt pan. Use a spatula to smooth the top. Pop it into the preheated oven. It will need about 70-80 minutes to bake. The best way to check if it's done is to insert a long wooden skewer or toothpick into the center of the cake (avoiding the tunnel in the middle of the bundt pan). It should come out clean or with just a few moist crumbs attached. If it comes out with wet batter, give it a few more minutes and test again. If the top starts browning too much before the inside is done, you can lightly tent it with foil. Once it's baked, take the cake out of the oven and let it cool in the pan on a wire rack for 10-15 minutes. This allows the cake to firm up slightly before you flip it. After 10-15 minutes, carefully invert the pan onto the wire rack. If you greased well, it should slide right out! Let the cake cool completely on the wire rack before even thinking about glazing it. Glazing a warm cake will just cause the glaze to melt and run everywhere!
- Step 4: Whip Up the Glaze: While the cake cools (or right before you're ready to glaze), make the cream cheese glaze. In a mixing bowl, beat the softened cream cheese until it's smooth and creamy – no lumps! Gradually add the sifted powdered sugar, mixing on low speed until it's all incorporated. Stir in the vanilla extract. Now, add the milk, one tablespoon at a time, mixing until you get a pourable consistency. You might need 2 tablespoons, you might need 3. It depends on how thick or thin you like your glaze!
- Step 5: Glaze and Serve: Once the cake is completely cool, place the wire rack over a baking sheet or some parchment paper to catch any drips (easy cleanup!). Drizzle that delicious cream cheese glaze all over the top of the cake, letting it drip down the sides. Let the glaze set for just a few minutes, then slice and enjoy! This cake is perfect on its own, or with a scoop of vanilla ice cream and fresh berries.