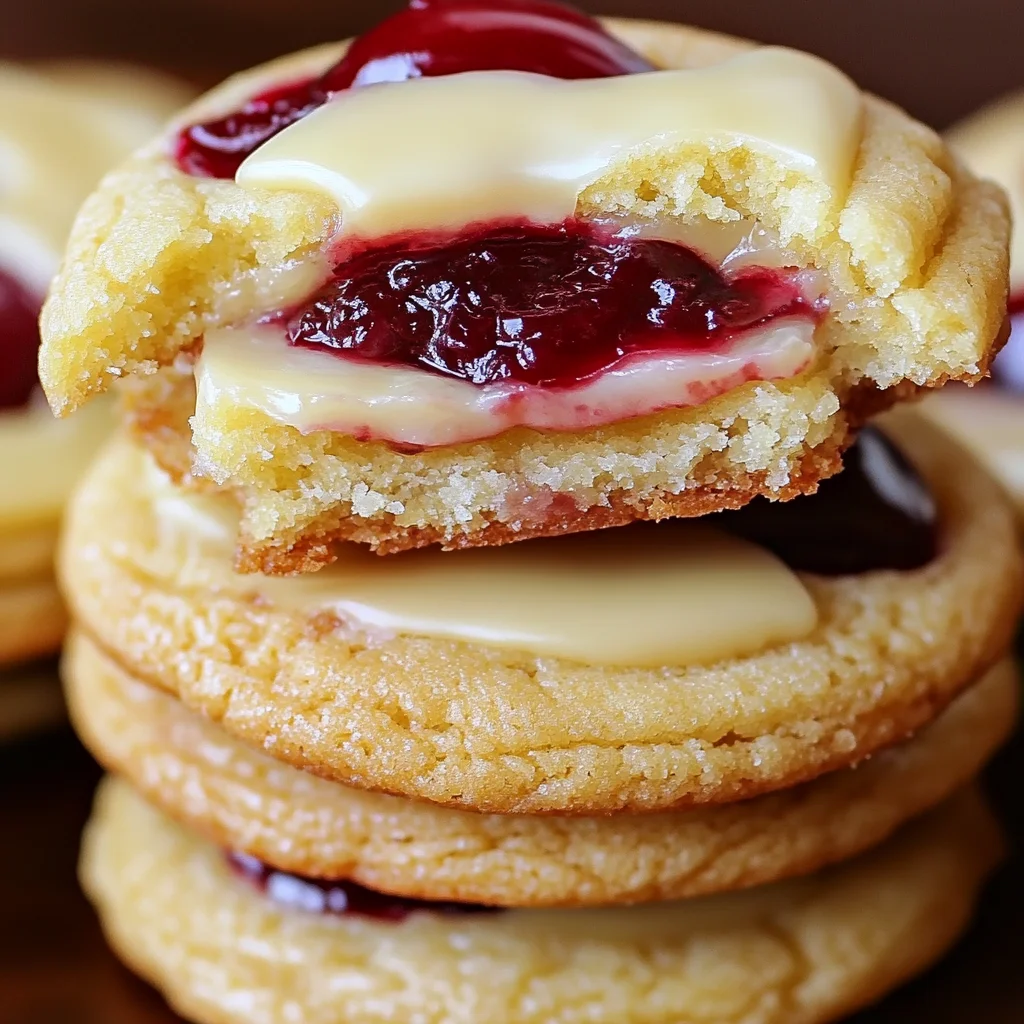
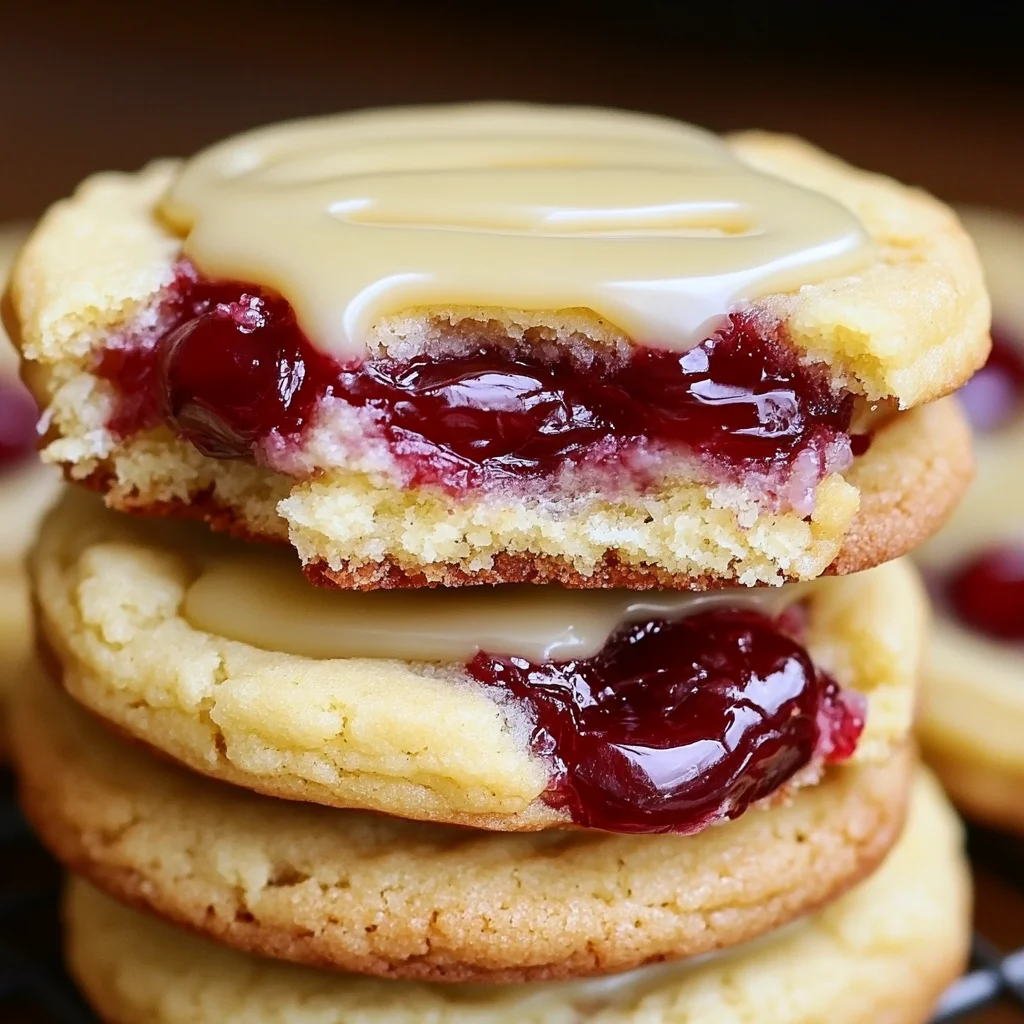
There’s something truly magical about a homemade cookie, isn’t there? It brings back memories of cozy kitchens, shared moments, and that unmistakable aroma filling the air. These Cherry Lemon Thumbprint Cookies are just the kind of treat that wraps you up in a warm hug. They’re simple to make, bursting with bright, cheerful flavors, and look absolutely darling all dressed up with their tangy lemon glaze. If you’re looking for a cookie that tastes like sunshine and comfort, you’ve found it!
Why You’ll Love This Recipe
- Fast
- Easy
- Giftable
- Crowd-pleasing
Ingredients
Here’s what you’ll need to whip up a batch of these beauties. Most of these are probably hanging out in your pantry already!
- 1 cup (2 sticks) unsalted butter, softened: Make sure it’s truly softened, not melted! This is key for that perfect cookie texture.
- ½ cup granulated sugar: Our sweet base for the cookie dough.
- 2 large eggs: Help bind everything together and add richness. Room temperature is always best if you remember!
- 1 teaspoon vanilla extract: Adds that classic, warm cookie flavor we all love.
- 2 ¾ cups all-purpose flour: The main structure of our cookie.
- 1 teaspoon baking soda: Helps with spread and gives a tender crumb.
- ½ teaspoon baking powder: Works with the baking soda for lift and lightness.
- ½ teaspoon salt: Just a little pinch to balance out the sweetness and enhance all the flavors.
- 1 cup cherry jam: Use your favorite kind! A good quality jam makes a difference here.
- 2 cups powdered sugar: Forms the sweet, smooth base for our glaze.
- 2-3 tablespoons lemon juice: Freshly squeezed is always, always best for that bright, zesty flavor. Start with 2 tbsp and add more to get your desired consistency.
- Zest of 1 lemon: Don’t skip this! It’s where so much of that wonderful lemon aroma and flavor lives.
- Yellow food coloring (optional): Totally for fun, just to give the glaze a lovely sunny hue.
How to Make It
Alright, let’s get baking! Follow these simple steps, and you’ll have a batch of gorgeous cookies in no time.
1. First things first, get your oven ready. Preheat it to 350°F (175°C). Line your baking sheets with parchment paper. This makes for easy cleanup and helps prevent sticking.
2. In a large bowl, grab your softened butter and granulated sugar. Beat them together using an electric mixer until the mixture is light and fluffy. This step is called creaming, and it incorporates air, which helps with the cookie’s texture.
3. Add your eggs one at a time, beating well after each addition. Then stir in that lovely vanilla extract.
4. In a separate, medium-sized bowl, whisk together your dry ingredients: the flour, baking soda, baking powder, and salt. Give it a good whisk to make sure everything is evenly distributed.
5. Now, gradually add the dry ingredients to your wet ingredients. Mix on low speed or by hand until everything is just combined. Stop mixing as soon as you see no more dry flour streaks! Overmixing can make your cookies tough, and we want them tender.
6. Time to form the cookies! Drop rounded tablespoons of dough onto your prepared baking sheets. Leave about 2 inches of space between each cookie to give them room to spread a little.
7. This is the “thumbprint” part! Gently press an indentation into the center of each cookie using your thumb or the back of a small spoon. Don’t go all the way through, but make a nice little well for the jam.
8. Carefully fill each indentation with a small amount of cherry jam. Don’t overfill, or the jam might bubble out too much during baking.
9. Bake for 10-12 minutes. You’ll know they’re done when the edges are lightly golden brown. The centers might still look a tiny bit soft, and that’s okay.
10. Let the cookies cool on the baking sheets for just a few minutes before carefully transferring them to wire racks to cool completely. It’s important they are completely cool before you glaze them.
11. While the cookies cool, whisk together your powdered sugar, lemon juice (start with 2 tbsp!), and lemon zest in a small bowl. Mix until you have a smooth, pourable glaze. If it’s too thick, add a tiny bit more lemon juice (or even a drop of milk or water). If it’s too thin, whisk in a little more powdered sugar. Stir in a drop of yellow food coloring if you want that sunny look!
12. Once the cookies are fully cooled, drizzle the lemon glaze over them. You can use a spoon or put the glaze in a small zip-top bag, snip off a corner, and pipe it on. Let the glaze set for about 30 minutes to an hour before stacking or serving.
Substitutions & Additions
Want to play around with this recipe? Go for it! Here are a few ideas:
- Change the Jam: Not a cherry fan? These are also amazing with raspberry, apricot, strawberry, or even a mixed berry jam!
- Add Almond Extract: A tiny splash (¼ to ½ teaspoon) of almond extract in the cookie dough or even the glaze pairs beautifully with cherry.
- Try Different Citrus: While lemon is classic, a lime glaze (using lime juice and zest) would give these a fun, tropical twist.
- Skip the Glaze: If you want a simpler cookie, you can totally skip the lemon glaze. The cookie and jam are delicious on their own!
Tips for Success
Here are a few little pointers I’ve learned along the way to help you make the most perfect cookies:
- Use Softened Butter: I can’t stress this enough! Cold butter won’t cream properly, and melted butter will make the cookies spread too much and potentially become greasy. Pull it out 30-60 minutes before you start.
- Measure Flour Correctly: Spoon your flour into your measuring cup and level it off with a knife. Scooping directly from the bag can compact the flour, leading to too much flour and dry cookies.
- Don’t Overmix: Once you add the flour mixture, mix just until everything is combined. Overmixing develops the gluten, making your cookies tough.
- Gentle Indentations: When you make the well for the jam, be gentle so you don’t crack the edges of the cookie dough too much.
- Cool Completely Before Glazing: If the cookies are warm, the glaze will just melt into them instead of setting up nicely on top.
How to Store It
These cookies keep really well, which is great news if you want to make them ahead or have leftovers (if that ever happens!).
Store cooled, glazed cookies in an airtight container at room temperature for up to 3-4 days. If the glaze is still a little soft, you might want to place parchment paper between the layers to prevent them from sticking together.
You can also freeze baked, unglazed cookies for up to 2-3 months. Thaw at room temperature and then make and apply the glaze just before serving.
FAQs
Got questions? I’ve got answers!
Q: Can I use cold butter in this recipe?
A: No, for the best texture, you really need softened butter. Cold butter won’t cream correctly with the sugar, and your cookies won’t have the right light and tender crumb.
Q: My cookies spread out too much! What happened?
A: This can happen for a few reasons. Make sure your butter wasn’t too soft (or even slightly melted). Also, ensure you measured your flour correctly (too little flour can cause excess spread). Overmixing the dough can also sometimes contribute.
Q: Can I make the dough ahead of time?
A: Yes! You can make the dough, wrap it tightly in plastic wrap, and store it in the refrigerator for up to 2 days. Let it sit out for about 15-20 minutes to soften slightly before scooping and proceeding with the recipe.

Cherry Lemon Thumbprint Cookies with Zesty Glaze
Ingredients
Equipment
Method
- Step 1: Preheat oven to 350°F (175°C). Line baking sheets with parchment paper.
- Step 2: In a large bowl, beat softened butter and granulated sugar using an electric mixer until light and fluffy.
- Step 3: Add eggs one at a time, beating well after each. Stir in vanilla extract.
- Step 4: In a separate medium-sized bowl, whisk together flour, baking soda, baking powder, and salt.
- Step 5: Gradually add the dry ingredients to the wet ingredients. Mix on low speed or by hand until just combined, stopping when no dry flour streaks remain.
- Step 6: Drop rounded tablespoons of dough onto prepared baking sheets, leaving about 2 inches of space between each.
- Step 7: Gently press an indentation into the center of each cookie using your thumb or a small spoon.
- Step 8: Carefully fill each indentation with a small amount of cherry jam.
- Step 9: Bake for 10-12 minutes, until edges are lightly golden brown. Centers may still look slightly soft.
- Step 10: Cool cookies on the baking sheets for a few minutes, then transfer to wire racks to cool completely.
- Step 11: While cookies cool, whisk together powdered sugar, lemon juice (start with 2 tbsp), and lemon zest in a small bowl until smooth. Adjust consistency with more lemon juice or powdered sugar. Stir in yellow food coloring if desired.
- Step 12: Once cookies are fully cooled, drizzle the lemon glaze over them. Let the glaze set for about 30 minutes to an hour before stacking or serving.