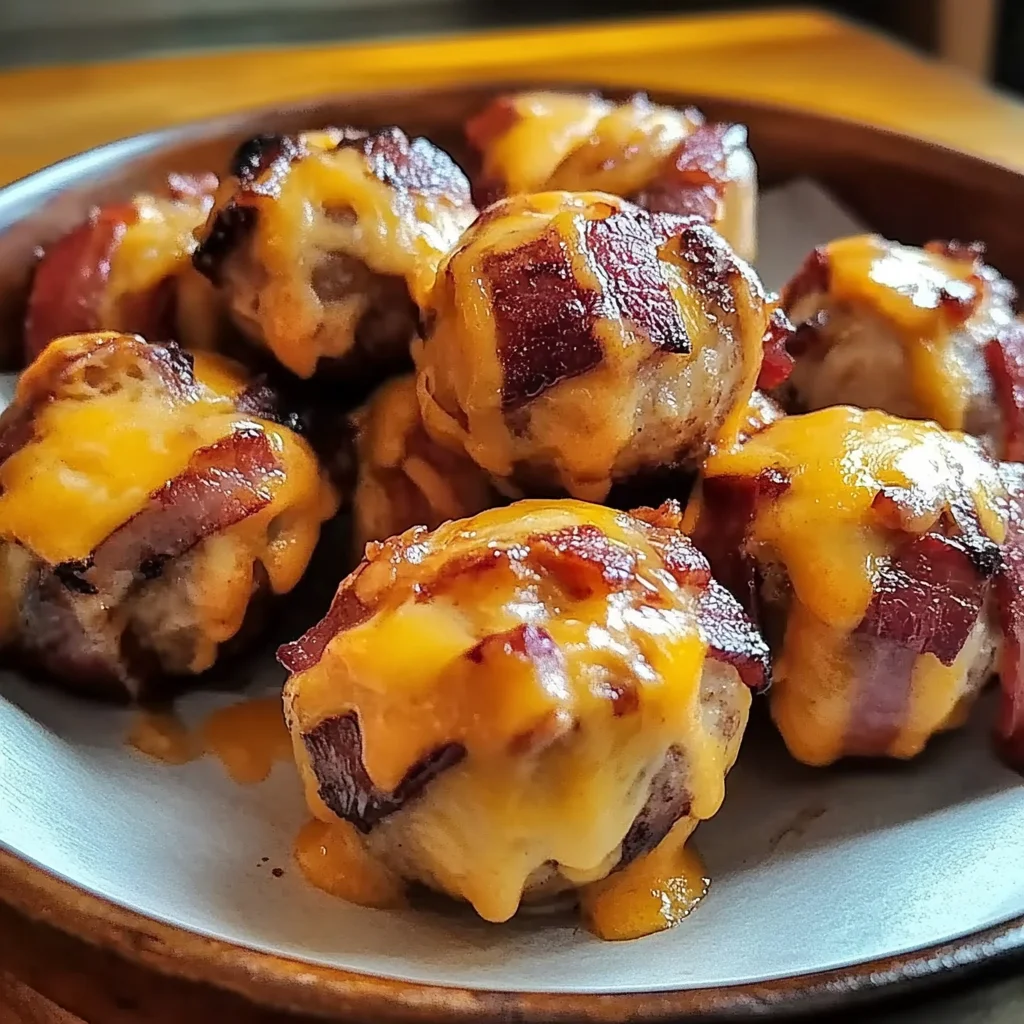
Oh honey, gather ’round, because I’ve got a recipe that’s going to make your taste buds sing and your party guests beg for more! Remember those classic comfort foods from childhood, the ones that just wrapped you up in a warm, flavorful hug? Well, these Cheesy BBQ Bacon Bombs are like that, but kicked up a notch with all the smoky, savory goodness you could ever dream of.
Seriously, if you’re looking for an appetizer that’s ridiculously easy to make, comes together in a flash, and disappears even faster, you’ve hit the jackpot. These little flavor explosions are perfect for game day, backyard barbecues, or just a cozy night in when you’re craving something truly special. Get ready to impress everyone with minimal effort – that’s my kind of cooking!
Why You’ll Love Cheesy BBQ Bacon Bombs
- Fast: From mixing bowl to oven in no time, leaving you more time to enjoy!
- Easy: Simple ingredients, straightforward steps – perfect for any home cook.
- Giftable: Bring a batch to your next potluck or picnic, and watch them vanish!
- Crowd-pleasing: Seriously, who can resist the magic combo of cheese, BBQ, and bacon?
Ingredients
Here’s what you’ll need to create these little bites of heaven. Don’t worry, it’s all stuff you can easily find at your local grocery store!
- 1 lb ground beef (80/20 blend): This blend gives you the best flavor and moisture. Trust me, a little fat means a lot of flavor!
- 1/2 cup barbecue sauce: Use your favorite kind! Smoky, sweet, tangy – whatever makes your heart happy.
- 1/2 cup grated sharp cheddar cheese: The sharp cheddar adds that perfect cheesy tang and melts beautifully inside.
- 1 tsp garlic powder: A pantry staple for a reason, it adds a lovely aromatic kick.
- 1 tsp onion powder: Enhances that savory base, bringing out the best in the beef.
- 1/4 tsp freshly cracked black pepper: Freshly cracked makes all the difference!
- 1/2 tsp kosher salt: Essential for seasoning, it balances all those delicious flavors.
- 12 strips thick-cut bacon: Thick-cut holds up best and gives you that satisfying crispy exterior.
- 12 toothpicks: These are your little helpers to keep everything together. If you’re planning to grill these, make sure to soak them in water first to prevent burning!
- Additional barbecue sauce for dipping (optional): Because more BBQ sauce is never a bad idea!
- Diced green onions for garnish (optional): Adds a pop of color and a fresh, mild oniony bite.
- Pickled jalapeños for extra flavor (optional): If you like a little heat and tang, these are a game-changer!
How to Make Cheesy BBQ Bacon Bombs
Alright, let’s get cooking! Follow these simple steps and you’ll have a platter of these incredible bombs ready in no time.
- Prep Your Oven: First things first, preheat your oven to a cozy 375°F (190°C). Then, grab a baking tray and line it with foil or parchment paper. Pop a wire rack on top – this little trick helps the bacon cook evenly all around, making it extra crispy!
- Mix Your Meat Magic: In a big bowl, gently combine your ground beef, that lovely grated sharp cheddar cheese, your favorite barbecue sauce, kosher salt, black pepper, garlic powder, and onion powder. Now, here’s a pro tip from my kitchen to yours: mix just until everything is combined. Overmixing can make your meatballs tough, and we want these babies tender and juicy!
- Roll ‘Em Up: Once your mixture is ready, divide it into 12 equal portions. I like to eyeball it, but if you want them perfectly uniform, you can use a kitchen scale. Roll each portion into a cute little 1.5-inch diameter ball.
- Bacon Wrap Time: This is where the magic happens! Take one strip of that glorious thick-cut bacon and carefully wrap it around each meatball. Make sure the bacon overlaps slightly so it completely covers the meatball. Secure each one with a toothpick. Remember, if you’re thinking about taking these to the grill later, a quick soak for your toothpicks means no burnt surprises!
- Bake to Perfection: Arrange your beautiful bacon-wrapped meatballs on your prepared wire rack. Pop them into the preheated oven and let them bake for 20-25 minutes. Don’t forget to flip them halfway through so that bacon gets crispy on all sides! You’ll know they’re done when the internal temperature reaches 160°F (71°C) and that bacon is cooked to your preferred level of crispiness.
- Rest and Serve: Once they’re out of the oven, transfer those glorious bombs to a plate lined with paper towels to catch any excess grease. Let them rest for about 5 minutes – this helps keep them juicy. Before you serve them up, be sure to remove all the toothpicks! Garnish with diced green onions and serve with extra barbecue sauce for dipping, and maybe some pickled jalapeños if you’re feeling adventurous.
Substitutions & Additions
Part of the fun of cooking is making a recipe your own! These Cheesy BBQ Bacon Bombs are super versatile. Here are a few ideas to get your creative juices flowing:
- Different Meats: Not a beef fan? No problem! You can easily swap the ground beef for ground turkey, ground chicken, or even a savory ground pork sausage for a different flavor profile.
- Cheese Please!: While sharp cheddar is amazing, feel free to experiment with other cheeses. Pepper Jack would add a nice spicy kick, mozzarella would give you an extra gooey pull, or smoked gouda could deepen that smoky flavor.
- Spice It Up: Want more heat? Add a pinch of cayenne pepper or a dash of your favorite hot sauce to the meat mixture. For an even more intense flavor, you could even mix in some finely diced fresh jalapeños (deseeded for less heat, or leave them in for a fiery punch!).
- Sauce Swaps: Play with different BBQ sauces! A sweet honey BBQ, a smoky mesquite, or a tangy Carolina mustard sauce would all be delicious. You could even drizzle them with a spicy honey mustard sauce, much like how you’d enjoy spicy honey mustard chicken strips!
- Hidden Veggies: For a little extra nutrition (and nobody will even know!), finely grate a zucchini or carrot and mix it into the beef mixture. Just be sure to squeeze out any excess moisture from the veggies first.
- Make it a Meal: Pair these delicious bombs with a comforting side like a creamy cream cheese corn casserole for a complete and satisfying dinner.
Tips for Success
Want to make sure your Cheesy BBQ Bacon Bombs are absolutely perfect every single time? Keep these tips in mind!
- Don’t Overmix: I can’t stress this enough! Mix the meat mixture just until combined. Overworking the meat makes it tough, and we want tender, juicy meatballs.
- Even Sizing: Try to make your meatballs roughly the same size. This ensures they cook evenly.
- Soak Those Toothpicks: If you’re going to grill these, or even if you just want to be extra cautious in the oven, soak your wooden toothpicks in water for at least 30 minutes before using them. This prevents them from burning.
- Use a Wire Rack: This is key for crispy bacon! The wire rack allows air to circulate around the meatballs, helping the bacon crisp up beautifully on all sides. Without it, the bottom of the bacon can get soggy.
- Don’t Overcrowd the Pan: Give your meatballs some space on the baking rack. If they’re too close together, they’ll steam instead of roast, and you won’t get that lovely crispy bacon.
- Resting is Best: Just like a good steak, letting your meatballs rest for a few minutes after baking helps redistribute the juices, keeping them moist and flavorful.
- Prep Ahead: You can absolutely assemble these bombs ahead of time! Prepare them up to step 4, then cover them tightly and refrigerate for up to 24 hours. Just add a few extra minutes to the baking time if cooking from cold.
How to Store Cheesy BBQ Bacon Bombs
If (and that’s a big “if”) you happen to have any of these delicious Cheesy BBQ Bacon Bombs leftover, here’s how to keep them fresh:
- Refrigeration: Store leftover cooked bacon bombs in an airtight container in the refrigerator for up to 3-4 days.
- Reheating: To reheat, you can pop them back in the oven at 350°F (175°C) for about 10-15 minutes, or until heated through and the bacon crisps up again. A microwave works in a pinch, but the bacon might not be as crispy.
- Freezing: These also freeze well! Once cooked and completely cooled, arrange them in a single layer on a baking sheet and freeze until solid. Then transfer them to a freezer-safe bag or container. They’ll keep for up to 2-3 months. Reheat from frozen in the oven at 350°F (175°C) for 20-30 minutes, or until hot.
FAQs
Can I make Cheesy BBQ Bacon Bombs without bacon?
While the bacon is a key part of the “bomb” experience, you absolutely can! You could use thinly sliced prosciutto or even wrap them in puff pastry for a different (but still delicious!) texture. Or, if you’re skipping the wrap entirely, they make fantastic standalone mini BBQ cheddar meatballs.
What kind of BBQ sauce is best for this recipe?
Honestly, the best BBQ sauce is your favorite BBQ sauce! A classic sweet and smoky sauce works wonderfully, but feel free to experiment. A spicy chipotle BBQ sauce would add a kick, or a tangy Carolina-style sauce would be equally delightful. It’s all about what you love!
Can I cook these on the grill instead of the oven?
Absolutely! Grilling adds an extra layer of smoky flavor. Just be sure to soak your toothpicks in water for at least 30 minutes before assembly to prevent them from burning on the grill. Cook over medium-high heat, turning frequently, until the bacon is crispy and the internal temperature of the meat reaches 160°F (71°C).
How do I prevent the bacon from getting soggy?
The key to crispy bacon is using a wire rack set over a foil-lined baking sheet. This allows air to circulate all around the bacon, crisping it up evenly and letting any excess grease drip away. Also, don’t overcrowd the pan!
For more delicious recipes and cooking inspiration, follow us on Pinterest!

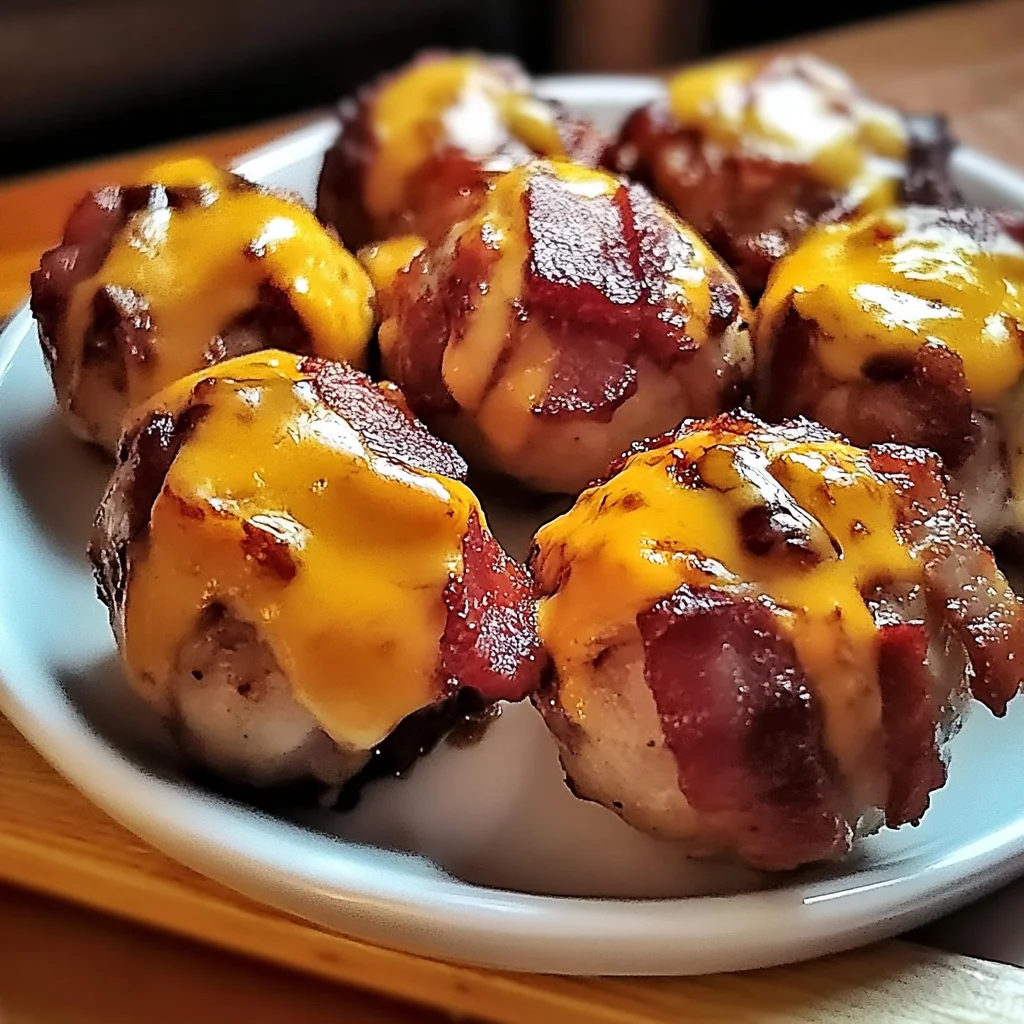
Irresistible Cheesy BBQ Bacon Bombs
Ingredients
Equipment
Method
- Step 1: Preheat your oven to 375°F (190°C). Line a baking tray with foil or parchment paper and place a wire rack on top.
- Step 2: In a large bowl, gently combine the ground beef, grated sharp cheddar cheese, barbecue sauce, kosher salt, black pepper, garlic powder, and onion powder. Mix just until everything is combined to avoid tough meatballs.
- Step 3: Divide the mixture into 12 equal portions and roll each into a 1.5-inch diameter ball.
- Step 4: Wrap one strip of thick-cut bacon around each meatball, ensuring the bacon overlaps slightly to cover the meatball completely. Secure each with a toothpick. If grilling, soak toothpicks in water beforehand.
- Step 5: Arrange the bacon-wrapped meatballs on the prepared wire rack. Bake for 20-25 minutes, flipping halfway through, until the internal temperature reaches 160°F (71°C) and the bacon is crispy.
- Step 6: Transfer the bombs to a plate lined with paper towels to catch excess grease. Let them rest for about 5 minutes. Remove all toothpicks before serving. Garnish with diced green onions and serve with extra barbecue sauce for dipping and optional pickled jalapeños.