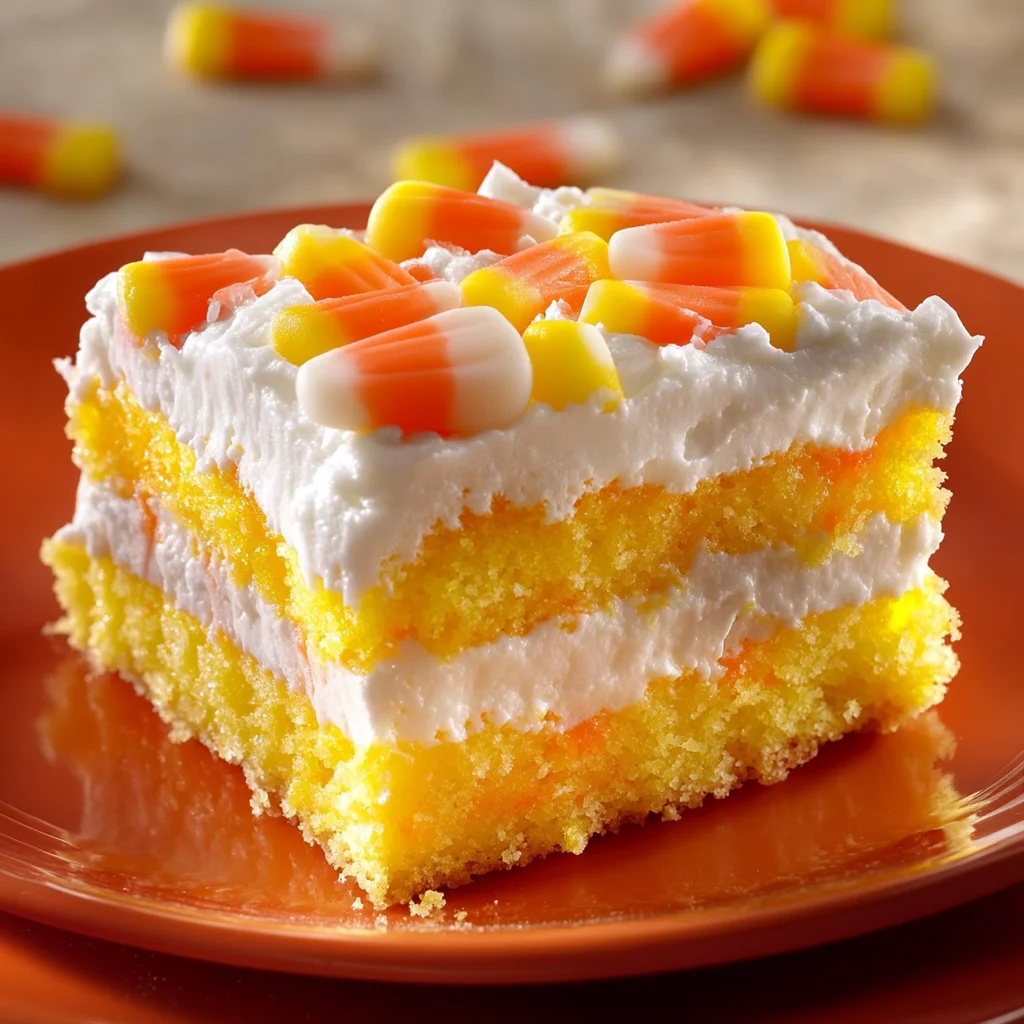
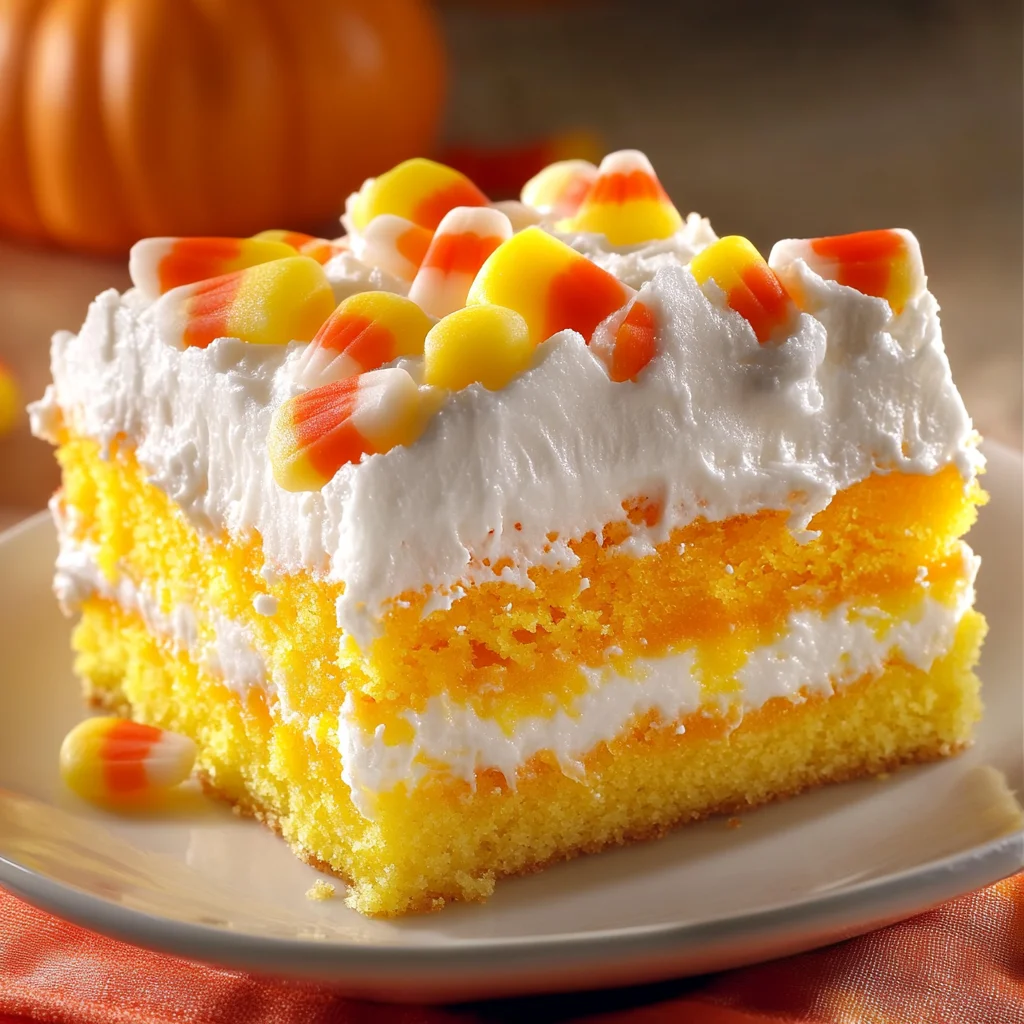
Oh, friend, there’s just something magical about fall, isn’t there? The crisp air, the rustling leaves, and of course, all the cozy, delicious treats! When Halloween rolls around, I always get a little nostalgic for those days of trick-or-treating, plastic pumpkin buckets, and coming home to share candy with family. This year, I wanted to capture that fun, festive spirit in a dessert that’s not just adorable but also incredibly easy to make. And let me tell you, this Candy Corn Poke Cake hits all the right notes! It’s quick, it’s vibrant, and it brings a smile to everyone’s face, reminding them of those classic autumn colors we all love. You’ll be amazed at how effortlessly you can whip up this show-stopping cake that looks like it took hours, but truly only requires a few simple steps.
Why You’ll Love Candy Corn Poke Cake
- Fast: Seriously, this cake comes together in a flash thanks to a trusty cake mix.
- Easy: No complicated techniques here, just mix, bake, poke, and chill!
- Giftable: Perfect for bringing to a Halloween party or as a sweet surprise for a friend.
- Crowd-pleasing: Who doesn’t love a moist, creamy cake with a fun, festive twist? If you love easy, delightful treats like this, you might also enjoy making some classic Muddy Buddies for another crowd-pleaser!
Ingredients
Gather ’round, because here’s what you’ll need for this delightful dessert. Most of these are pantry staples, making this recipe a breeze to pull together!
- 1 box white cake mix (plus ingredients required on package): Your secret weapon for a quick start! Any brand will do.
- 1 (3.4-ounce) box instant vanilla pudding mix: This is what gives our cake that lovely, moist texture and fills those delightful poked holes.
- 2 cups cold milk: To whisk with your pudding mix. Make sure it’s cold for the best consistency.
- Orange food coloring: For that vibrant, classic candy corn middle layer.
- Yellow food coloring: To create the sunny base layer.
- 1 (8-ounce) container whipped topping: The perfect fluffy, sweet crown for our cake. You can use thawed frozen whipped topping or fresh whipped cream.
- Candy corn, for topping: The iconic garnish that gives this cake its name and charm!
How to Make Candy Corn Poke Cake
Let’s get baking! You’ll be surprised how fun and simple this process is.
- First things first, you’ll want to preheat your oven to the temperature specified on your cake mix box. While it’s heating up, lightly grease a 9×13-inch baking pan. A little non-stick spray or butter will ensure your cake slides out beautifully.
- Next, prepare your white cake batter according to the package instructions. Don’t overmix it; just get it smooth and ready.
- Now for the fun part! Divide your prepared batter evenly into two separate bowls. We’re going to create those signature candy corn colors!
- In one bowl, add a few drops of yellow food coloring. Stir it gently until the color is evenly blended and you have a lovely, sunny yellow.
- In the other bowl, add a few drops of orange food coloring. Stir that one up until it’s fully mixed and you’ve got a bright, cheerful orange.
- Carefully pour the yellow batter evenly into your greased baking pan, spreading it to cover the bottom. This will be your base layer.
- Then, with a gentle hand, carefully pour the orange batter directly over the yellow layer. Try your best not to mix the colors too much – we want those distinct layers!
- Pop your colorful cake into the preheated oven and bake for the time recommended on your cake mix box. You’ll know it’s ready when a toothpick inserted into the center comes out clean.
- Once baked, remove the cake from the oven and let it cool on a wire rack for about 15 minutes. This cooling time is important before the next step.
- Now, for the “poke” part of the poke cake! Grab the handle of a wooden spoon (or a round dowel if you have one) and gently poke holes approximately one inch apart all over the cake. Make sure to go almost all the way to the bottom. These little tunnels are where all the magic happens!
- In a medium bowl, whisk together your instant vanilla pudding mix and cold milk for 2 minutes. You’ll see it start to thicken slightly – that’s exactly what we want.
- Pour this creamy pudding mixture evenly over the cake, making sure it seeps down into all those lovely holes you just made.
- Use a spatula to gently smooth any excess pudding over the surface of the cake. Now, here’s the hardest part: refrigerate your cake for at least 2 hours to allow the pudding to set completely and for the flavors to meld beautifully.
- Just before you’re ready to serve, spread the whipped topping evenly over your chilled cake. This adds a light, creamy finish.
- Finally, garnish the top generously with candy corn. Arrange them in a fun pattern or just scatter them for a festive look!
- Slice into individual servings and watch those colorful layers appear! Enjoy your homemade masterpiece!
Substitutions & Additions
One of the best things about a poke cake is how versatile it is! You can totally make this recipe your own.
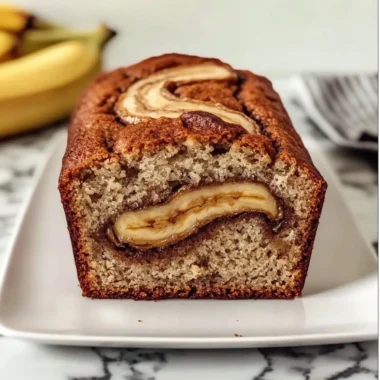
- Cake Mix: While white cake mix gives you the brightest colors, you could experiment with a yellow cake mix for an even richer yellow base. Chocolate cake mix would be fun for a “spooky” twist, or even a pumpkin banana loaf for extra autumnal flavor!
- Pudding Flavor: Vanilla is classic, but why not try butterscotch or even a white chocolate pudding mix for a different flavor profile?
- Toppings: Beyond candy corn, consider adding a sprinkle of festive Halloween sprinkles, some chopped nuts, or even a drizzle of caramel sauce. Mini chocolate chips are always a hit too!
- Whipped Topping: If you’re feeling ambitious, homemade whipped cream with a touch of vanilla extract is always a winner.
Tips for Success
Even though this is a super easy recipe, a few little tricks can make it absolutely perfect.
- Don’t Rush the Cooling: Make sure your cake cools for at least 15 minutes before you start poking holes. If it’s too hot, the cake might tear, and the pudding won’t set as well.
- Deep, Even Pokes: Try to poke your holes relatively deep and evenly spaced. This ensures the pudding gets distributed throughout the cake for ultimate moisture.
- Chill Time is Crucial: Seriously, do not skip the 2-hour refrigeration. This is when the pudding truly sets, absorbs into the cake, and creates that delightful poke cake texture. If you’re looking for other easy, no-fuss desserts that rely on chilling, you might love our easy no-bake caramel pretzel bars!
- Gentle Pouring: When adding the colored batters, pour slowly and gently to keep your layers distinct. It doesn’t have to be perfect, but a slow hand helps!
How to Store Candy Corn Poke Cake
This cake is best enjoyed fresh, but if you have leftovers (which I doubt you will!), here’s how to keep it delicious:
- Refrigeration: Since it contains pudding and whipped topping, this cake absolutely needs to be stored in the refrigerator.
- Cover It Up: Place any leftover slices or the entire pan in an airtight container or cover it tightly with plastic wrap. This prevents it from drying out and absorbing any fridge odors.
- Shelf Life: Stored properly, your Candy Corn Poke Cake will stay fresh for up to 3-4 days in the refrigerator.
FAQs
Q: Can I make this cake ahead of time for a party?
Absolutely! This cake is perfect for making a day in advance. In fact, it often tastes even better the next day once the pudding has fully seeped into the cake and chilled properly. Just hold off on adding the candy corn until just before serving for the freshest look.
Q: What if I don’t like candy corn? Can I still make this cake?
You sure can! The candy corn is mostly for decoration and theme. If you’re not a fan of the actual candy, you can omit it or swap it for other festive toppings like autumn-colored sprinkles, chopped nuts, or even a drizzle of chocolate ganache.
Q: My cake layers bled together a bit. What happened?
This can happen if the batters were poured too quickly or if the pan was jostled. It won’t affect the taste at all! For more defined layers next time, try pouring the batters very slowly and gently over the back of a spoon to help them float on top of each other rather than mixing.
For more delicious recipes and kitchen inspiration, be sure to follow us on Pinterest!

Spooktacular Candy Corn Poke Cake
Ingredients
Equipment
Method
- Step 1: Preheat your oven to the temperature specified on your cake mix box. Lightly grease a 9x13-inch baking pan.
- Step 2: Prepare your white cake batter according to the package instructions. Do not overmix.
- Step 3: Divide the prepared batter evenly into two separate bowls.
- Step 4: In one bowl, add a few drops of yellow food coloring and stir gently until evenly blended.
- Step 5: In the other bowl, add a few drops of orange food coloring and stir until fully mixed.
- Step 6: Carefully pour the yellow batter evenly into your greased baking pan, spreading it to cover the bottom.
- Step 7: Gently pour the orange batter directly over the yellow layer, trying not to mix the colors too much.
- Step 8: Bake for the time recommended on your cake mix box, or until a toothpick inserted into the center comes out clean.
- Step 9: Remove the cake from the oven and let it cool on a wire rack for about 15 minutes.
- Step 10: Grab the handle of a wooden spoon (or a round dowel) and gently poke holes approximately one inch apart all over the cake, almost all the way to the bottom.
- Step 11: In a medium bowl, whisk together the instant vanilla pudding mix and cold milk for 2 minutes, until slightly thickened.
- Step 12: Pour the creamy pudding mixture evenly over the cake, making sure it seeps down into all the holes. Use a spatula to gently smooth any excess pudding over the surface.
- Step 13: Refrigerate the cake for at least 2 hours to allow the pudding to set completely and for the flavors to meld.
- Step 14: Just before serving, spread the whipped topping evenly over your chilled cake.
- Step 15: Garnish the top generously with candy corn. Slice into individual servings and enjoy!