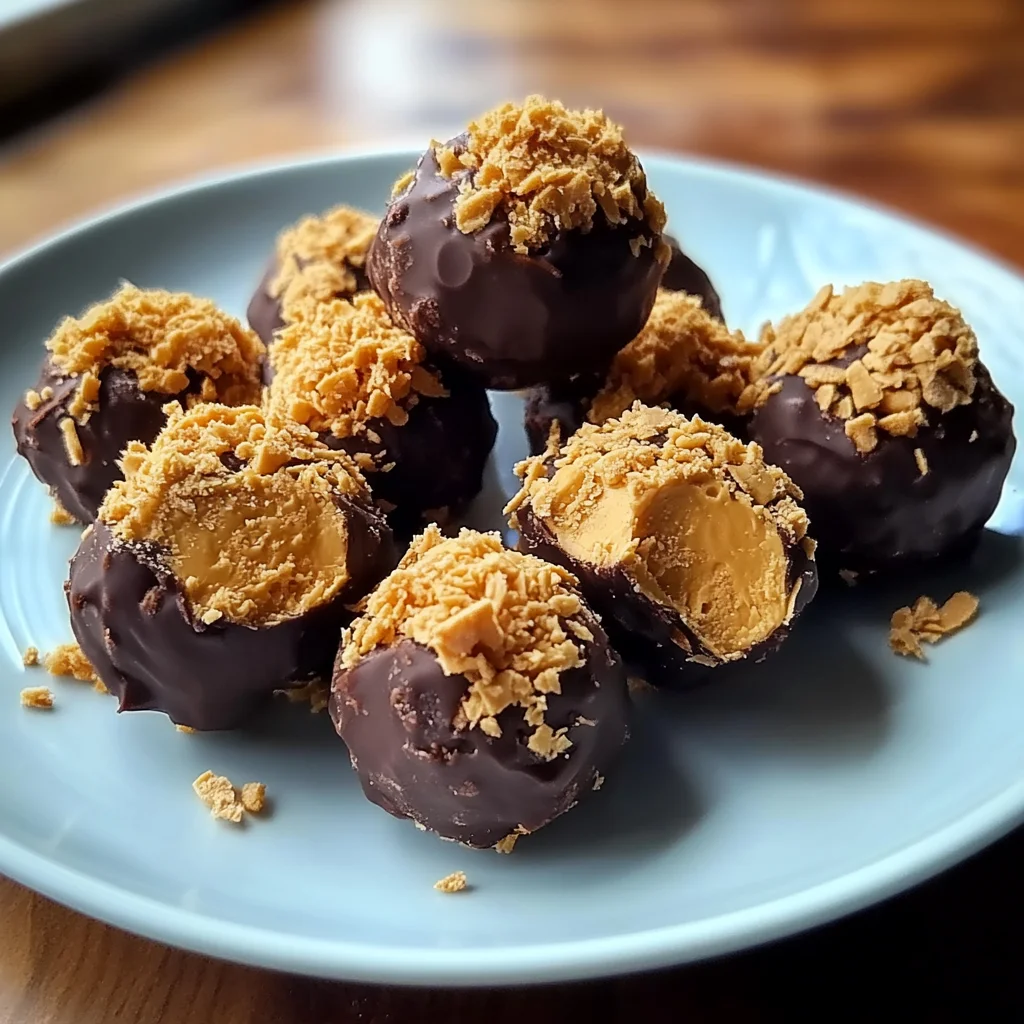
Do you remember those sweet little treats from childhood that made holidays and family gatherings just a bit more magical? For me, Butterfinger Balls are one of those nostalgic delights that bring back warm memories of cozy kitchens and laughter-filled afternoons. These little bites of peanut buttery, chocolatey goodness are not only irresistibly tasty but also incredibly simple to whip up. Whether you’re making them for a festive party, a gift, or just a special treat for yourself, this recipe will quickly become a favorite in your dessert rotation.
What I love most about Butterfinger Balls is how fast and fuss-free they are. You don’t need hours or a long list of ingredients to create something that tastes like it took way more effort than it really did. Plus, they are perfect bite-sized snacks that everyone will adore. You’ll find yourself coming back to this recipe time and again, especially when you want a quick homemade treat that feels just a little bit fancy.
Why You’ll Love Butterfinger Balls
- Fast: Ready in under an hour, including chilling time.
- Easy: Minimal ingredients and no baking required.
- Giftable: Perfect for holiday baskets or party favors.
- Crowd-pleasing: Rich, peanut buttery flavor with a satisfying crunch.
Ingredients
Before we dive into making these heavenly Butterfinger Balls, let’s talk about the ingredients and why each one is important. This simple list packs a punch in flavor and texture, balancing creamy peanut butter with the sweet crunch of Butterfinger bars and the smooth richness of chocolate.
- 4 tbsp butter, softened: Butter adds a silky richness and helps bind everything together, making the balls smooth and creamy.
- 1 tsp vanilla extract: This little addition enhances all the flavors and adds a subtle warmth that makes these treats irresistible.
- 8 oz chocolate bark or chocolate chips: For coating the balls — choose your favorite chocolate, whether it’s milk, dark, or even white. I personally like milk chocolate for that classic, sweet finish.
- 1/2 cup Butterfinger bars, crushed: The star of the show! Their crispy, peanut buttery crunch is what makes these balls stand out.
- 1 cup powdered sugar: Adds that perfect amount of sweetness and helps firm up the mixture.
- 1 cup peanut butter (not natural): Use a creamy, non-natural peanut butter with stabilizers so it holds together well. It’s the heart and soul of this recipe.
- 3/4 cup graham cracker crumbs: Adds texture and helps balance the sweetness with a slightly toasty flavor.
- Extra crushed Butterfinger bars or sprinkles (optional): For decorating the finished balls — makes them look even more festive and inviting.
- Coarse sea salt (optional): A pinch on top can elevate the flavors by adding a bit of contrast to all the sweetness.
How to Make Butterfinger Balls
Now that you have your ingredients lined up, let’s walk through the process together. I’ll share some tips along the way so you can get the perfect texture and flavor every time.
- Beat the butter and peanut butter: In a large mixing bowl, start by beating the softened butter and peanut butter together until you get a smooth, creamy consistency. This step is key because it ensures your balls won’t be crumbly. If the butter isn’t soft enough, you might want to microwave it for 10 seconds to help it along.
- Add vanilla: Pour in the vanilla extract and mix it in well. Vanilla is a subtle but essential ingredient that adds depth to the peanut butter and chocolate flavors.
- Incorporate powdered sugar: Gradually add the powdered sugar, mixing on low speed. Take your time here and scrape down the sides of your bowl to make sure everything blends evenly. The powdered sugar will sweeten and help firm your mixture, so don’t skip this step!
- Fold in graham cracker crumbs and crushed Butterfinger bars: Using a spatula, gently fold in the graham cracker crumbs and crushed Butterfinger bars until evenly combined. The texture should be thick but pliable. The graham crackers add a nice crunch and a mellow flavor that balances the sweetness from the candy bars.
- Shape the balls: Scoop about 1 to 1½ tablespoons of the mixture and roll it between your palms to form balls. Place them on a baking sheet lined with parchment paper. Try to make them roughly the same size for even chilling and coating.
- Freeze the balls: Pop the tray into the freezer for about 30 minutes. This step is crucial because chilled balls dip more easily in chocolate and hold their shape better.
- Melt the chocolate: While the balls chill, melt your chocolate bark or chips in a microwave-safe bowl. Heat at 50% power in 30-second bursts, stirring after each interval until smooth. Be patient here; melting chocolate too quickly can cause it to seize and become grainy.
- Dip the balls: Using a fork or dipping tool, dip each chilled ball into the melted chocolate, making sure it’s fully coated. Shake off any excess chocolate and place the balls back on the parchment-lined sheet.
- Decorate: While the chocolate is still wet, sprinkle extra crushed Butterfinger bars, colorful sprinkles, or a tiny pinch of coarse sea salt on top for that extra wow factor and texture contrast.
- Let the chocolate set: Allow the chocolate to harden completely at room temperature or pop the tray back into the fridge for quicker setting. Once set, they’re ready to enjoy or package up as lovely gifts!
And there you have it — sweet, crunchy, peanut buttery Butterfinger Balls that come together in no time and disappear even faster.
Substitutions & Additions
If you want to get creative or adjust the recipe to your pantry staples, here are some fun ideas to customize your Butterfinger Balls:
- Nut butter swaps: If peanut butter isn’t your thing, try almond butter or sunflower seed butter. Just be aware these may alter the taste slightly and might require a touch less powdered sugar if the nut butter is sweeter.
- Chocolate options: Dark chocolate or white chocolate work beautifully for dipping. For a festive twist, use colored candy melts or drizzle contrasting chocolate over the final balls for a pretty presentation.
- Add crunch: Mix in chopped nuts like pecans or walnuts for a different texture dimension.
- Extra flavor: A pinch of cinnamon or a splash of bourbon in the batter adds a lovely warmth and complexity.
- Decorations: Swap out sprinkles for crushed pretzels, mini chocolate chips, or even edible glitter to make them party-ready.
If you love simple, no-bake treats like these, you might also enjoy the delightful ease of my Easy No-Bake Caramel Pretzel Bars or the nostalgic fun of Muddy Buddies, both perfect for satisfying your sweet tooth without turning on the oven.
Tips for Success
Making Butterfinger Balls is straightforward, but a few tricks can make your experience even smoother and the results more perfect every time:
- Use room temperature butter: Softened butter blends better with peanut butter and prevents lumps.
- Don’t skip chilling: Freezing the balls before dipping helps keep their shape and ensures a clean chocolate coating.
- Crush candy finely but not to dust: You want little bits for crunch, not powder.
- Mix gently but thoroughly: Overmixing can make the mixture too stiff; under-mixing leaves uneven pockets of sugar or crumbs.
- Chocolate melting: Melt chocolate slowly and stir often to avoid seizing.
- Store balls on parchment: This prevents sticking and keeps them looking neat.
- Prep ahead: Make the balls a day in advance and store them frozen, then dip in chocolate just before serving for fresher texture.
For other easy and crowd-pleasing no-bake treats that are just as fun to make and share, check out my No-Bake Oreo Bars or the delightfully creamy No-Bake Banana Split Cheesecake.
How to Store Butterfinger Balls
Once your Butterfinger Balls are dipped and decorated, keeping them fresh and delicious is a breeze. Here’s how to store them to maintain their texture and flavor:
- Refrigerate: Store the balls in an airtight container in the fridge for up to 1 week. This keeps the chocolate coating firm and the inside creamy.
- Freeze for longer: If you want to keep them for a longer time, place them in a single layer on a parchment-lined tray and freeze until firm, then transfer to a freezer-safe container. They’ll keep well for up to 3 months.
- Thawing: To enjoy, thaw in the fridge for a couple of hours or at room temperature for about 30 minutes. Avoid microwaving as it can melt the chocolate unevenly.
Packaging these in pretty boxes or jars makes a wonderful homemade gift, especially during the holiday season or for birthdays. I always like to add a little ribbon and a handwritten tag for that extra special touch.
FAQs
Can I use natural peanut butter for Butterfinger Balls?
Natural peanut butter has more oil and less stabilizers, which can affect the texture. If you use it, the mixture may be softer and harder to shape, so you might need to add a bit more powdered sugar or graham cracker crumbs.
What if I don’t have Butterfinger bars? Can I substitute something else?
Absolutely! Crunchy peanut butter cups, crushed Heath bars, or even chopped toffee bits make great alternatives that will still add a lovely crunch and flavor.
Can I make these dairy-free?
Yes, by swapping regular butter for a dairy-free margarine or coconut oil and using dairy-free chocolate, you can make these suitable for dairy-free diets. The texture might vary slightly, but they’ll still be delicious.
How do I prevent the chocolate from cracking after dipping?
Make sure to melt the chocolate slowly and cool the coated balls at room temperature or in the fridge. Avoid rapid temperature changes. Using chocolate bark with added stabilizers can also help create a smooth finish.
Making Butterfinger Balls is such a joyful and rewarding kitchen project. If you’re looking for other sweet, easy recipes to explore, you might find inspiration in my Pumpkin Banana Loaf, which is a cozy treat perfect for fall mornings.
Thanks for stopping by the kitchen today! I hope this Butterfinger Balls recipe brings a little extra sweetness and nostalgia to your day. Don’t forget to bookmark it for your next gathering or when you need a quick homemade gift idea.
For more delicious recipes and kitchen inspiration, be sure to follow me on Pinterest!
Butterfinger Balls
Ingredients
Equipment
Method
- Step 1: Beat softened butter and peanut butter together in a large mixing bowl until smooth and creamy. If needed, microwave butter for 10 seconds to soften.
- Step 2: Add vanilla extract and mix well to combine.
- Step 3: Gradually add powdered sugar while mixing on low speed. Scrape down bowl sides to ensure even blending.
- Step 4: Fold in graham cracker crumbs and crushed Butterfinger bars until mixture is thick but pliable.
- Step 5: Scoop about 1 to 1½ tablespoons of mixture and roll into balls. Place on a parchment-lined baking sheet, making balls roughly the same size.
- Step 6: Freeze balls for about 30 minutes to firm up for easier dipping.
- Step 7: Melt chocolate bark or chips in a microwave-safe bowl at 50% power in 30-second bursts, stirring until smooth.
- Step 8: Using a fork or dipping tool, dip each chilled ball fully in melted chocolate. Shake off excess and place back on parchment-lined sheet.
- Step 9: While chocolate is still wet, sprinkle extra crushed Butterfinger bars, sprinkles, or a pinch of coarse sea salt on top if desired.
- Step 10: Let chocolate harden completely at room temperature or refrigerate for quicker setting. Once set, balls are ready to enjoy or package.