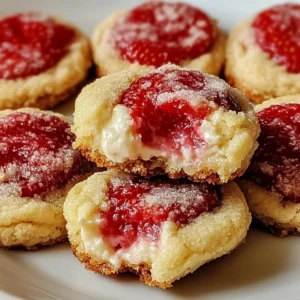
Strawberry Cheesecake Cookies
Experience the joy of strawberry cheesecake in a convenient, portable cookie form! These unbelievably easy and quick-to-make cookies are packed with creamy, tangy filling and bright strawberry topping, offering all the delightful flavors of a classic cheesecake.
Equipment
- Oven
- Baking sheets
- Parchment paper
- Small bowl
- Large bowl
- Electric mixer
- Whisk
- small saucepan
- Wire rack
Ingredients
For the Cheesecake Filling
- 8 oz cream cheese softened, full-fat
- 1/3 cup powdered sugar confectioners' sugar
- 1 tsp vanilla extract
For the Cookie Dough
- 1 cup unsalted butter 2 sticks, softened
- 1 cup granulated sugar
- 1/2 cup brown sugar
- 2 large eggs room temperature
- 2 tsp vanilla extract
- 3 cups all-purpose flour
- 1 tsp baking soda
- 1/2 tsp baking powder
- 1/2 tsp salt
For the Strawberry Topping
- 1.5 cups fresh strawberries finely chopped, or frozen (thawed and drained)
- 2 tbsp granulated sugar
- 1 tsp cornstarch optional, to thicken
For Garnish
- extra granulated sugar for sprinkling
Instructions
- Step 1: Get Ready to Bake: First things first, preheat your oven to a cozy 350°F (175°C). Then, grab a couple of baking sheets and line them with parchment paper. This makes for easy cleanup and prevents sticking!
- Step 2: Whip Up the Cheesecake Filling: In a small bowl, combine your softened cream cheese, powdered sugar, and that first teaspoon of vanilla extract. Mix it all together until it's wonderfully smooth and creamy. Set this aside; it’s going to be the dreamy heart of our cookies!
- Step 3: Cream the Butter and Sugars: Now, in a large bowl, it's time to get that softened butter working with the granulated sugar and brown sugar. Beat them together until the mixture looks light and fluffy. This step is super important for cookie texture, so give it a good minute or two!
- Step 4: Add Eggs and More Vanilla: Crack in your eggs, one at a time, beating well after each addition to ensure everything is nicely combined. Once the eggs are in, stir in the remaining 2 teaspoons of vanilla extract. Mmm, that smell!
- Step 5: Whisk the Dry Ingredients: In a separate bowl (I always recommend this to avoid clumps!), whisk together your flour, baking soda, baking powder, and salt. Giving them a good whisk now ensures they’re evenly distributed throughout your dough.
- Step 6: Combine Wet and Dry: Gradually add your dry ingredient mixture to the butter mixture. Mix just until everything is combined. Be careful not to overmix; too much mixing can lead to tough cookies!
- Step 7: Cook Your Strawberry Topping: In a small saucepan, toss together your finely chopped strawberries, 2 tablespoons of granulated sugar, and the cornstarch (if you're using it, and I really think you should for the best results!). Cook this over medium heat, stirring frequently. You’ll see it thicken slightly in about 5 minutes, turning into a lovely, glossy, jam-like topping. Once it’s reached that perfect consistency, take it off the heat and let it cool completely. This prevents your cookies from getting soggy.
- Step 8: Shape and Fill Your Cookies: Now for the fun part! Roll your cookie dough into 1-inch balls and arrange them on your prepared baking sheets. Take each ball and flatten it just a little, then use your thumb or the back of a small spoon to create a cozy little well in the center of each one.
- Step 9: Add the Goodness: Spoon about a teaspoon of your creamy cheesecake filling into each well. Then, carefully top that with about a teaspoon of your cooled strawberry topping. Try not to overfill, or they might overflow during baking!
- Step 10: Sprinkle with Sugar: Give each cookie a light sprinkle of extra granulated sugar. It adds a lovely finish!
- Step 11: Bake to Perfection: Pop your baking sheets into the preheated oven and bake for 12-15 minutes. You're looking for the edges to be lightly golden, but the centers should still be soft. That’s how you know they’ll be perfectly chewy!
- Step 12: Cool and Enjoy: Once baked, let those beautiful cookies cool on the baking sheet for about 5 minutes. They're delicate when hot! After that, gently transfer them to a wire rack to cool completely. This helps them set up and achieve that ideal texture.
Notes
Substitutions & Additions
One of the best things about baking is getting creative! Here are some ideas to make these Strawberry Cheesecake Cookies uniquely yours:- Berry Swaps: Not a strawberry fan? Or just want to try something new? You can easily swap the strawberries for finely chopped raspberries, blueberries, or even a mixed berry blend. If using frozen, always thaw and drain them well!
- Lemon Zest Boost: For an extra pop of brightness, add a teaspoon of lemon zest to your cheesecake filling. It beautifully complements the strawberry!
- Chocolate Drizzle: Once the cookies are cooled, a drizzle of melted white chocolate or dark chocolate would be absolutely divine.
- Nutty Crunch: A sprinkle of finely chopped pistachios or walnuts on top before baking could add a wonderful texture and flavor contrast.
- Different Spices: A tiny pinch of cardamom or cinnamon in the strawberry topping can add an unexpected, delightful warmth.
Tips for Success
Want to make sure your Strawberry Cheesecake Cookies turn out perfectly every single time? Keep these handy tips in mind!- Room Temperature is Key: I can’t stress this enough! Make sure your butter, cream cheese, and eggs are all at room temperature. This helps them cream together smoothly and incorporate evenly, leading to a much better cookie texture.
- Don't Overmix the Dough: Once you add the dry ingredients to the wet, mix just until combined. Overmixing develops the gluten in the flour, which can result in tough cookies instead of soft, chewy ones.
- Cool the Strawberry Topping: Allowing your strawberry topping to cool completely before adding it to the cookies is crucial. If it's warm, it can make your cookie dough and cheesecake filling too runny, leading to a mess.
- Create a Good Well: When making the indentation in the cookie dough, aim for a decent-sized well that can hold the filling without overflowing. Be gentle, but firm enough to create a good pocket.
- Watch the Edges: Every oven is a little different, so keep an eye on your cookies during the last few minutes of baking. You want the edges to be lightly golden, but the centers should still look soft. This gives you that perfect chewy-soft balance.
- Prep Ahead: You can make the cheesecake filling and strawberry topping a day in advance and store them in the fridge. Just let the filling come closer to room temp before using. You can even prepare the cookie dough a day ahead too, and chill it, then simply roll, fill, and bake when you're ready! If you love prepping delicious cookie dough in advance, you might also enjoy making a batch of these melt-in-your-mouth chocolate chip cheesecake cookies for another day!