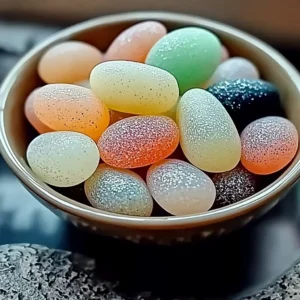
DIY Aroma Stones
Discover how to create your own all-natural aroma stones at home! These DIY beauties are super easy and quick to whip up, making them perfect for personalized gifts or simply to fill your home with a lovely, natural fragrance.
Equipment
- Medium-sized mixing bowl
- Silicone Molds, Cookie Cutters, or Trays
- Spoon
- Parchment paper
Ingredients
- 1 cup Baking Soda main base, helps stones harden nicely
- 1/2 cup Cornstarch helps bind everything together and gives a smooth finish
- 1/2 cup Water regular tap water, to create the paste
- 15-30 drops Essential Oils of your choice (e.g., lavender, peppermint, citrus), adjust to preferred strength
- Food Coloring or Mica Powder optional, for a pop of color (a tiny drop or pinch)
- Dried Herbs or Edible Flowers optional, for an extra touch of beauty and natural charm (e.g., lavender, rose petals, rosemary)
Instructions
- Step 1: Mix Your Dry Ingredients. In a medium-sized mixing bowl, combine the baking soda and cornstarch. Stir them really well until they are totally blended and lump-free.
- Step 2: Add the Water Gradually. Slowly pour in the water, stirring continuously. You are aiming for a thick, moldable paste, almost like playdough. Adjust with a tiny bit more baking soda/cornstarch if too wet, or a few more drops of water if too dry.
- Step 3: Infuse with Scent. Add 15-30 drops of your essential oils to the paste. Stir it in really well to ensure the fragrance is evenly distributed throughout your mixture.
- Step 4: Add a Splash of Color (Optional). If desired, add a small drop of food coloring or a pinch of mica powder. Mix until you get the shade you are happy with.
- Step 5: Fill Your Molds. Take your chosen silicone molds or cookie cutters (on a parchment-lined tray) and gently fill them about three-quarters of the way full with your mixture. Use the back of a spoon to smooth out the surface, pressing down firmly if using cookie cutters.
- Step 6: Let Them Dry. Carefully place your filled molds (or shaped stones on parchment paper) in a dry, well-ventilated spot. Let them dry for 6 to 24 hours, or until they are completely rock-hard. This step requires patience!
- Step 7: Release Your Creations. Once they are totally dry and firm, gently pop your beautiful aroma stones out of their molds. Handle them with care and admire your handiwork!
Notes
Substitutions & Additions: While baking soda and cornstarch are ideal, you could experiment with other finely ground flours like arrowroot powder, though results may vary. For natural colorants, try turmeric for yellow, spirulina for green, or beet powder for a soft pink. Before your stones fully dry, you can press small decorative items onto their surface, such as tiny seashells, decorative beads, or a sprinkle of glitter. Once dry, you can paint designs on your stones with acrylic paint or use a fine-tipped marker; ensure the paint is fully dry before adding essential oils again.
Tips for Success: The most common mistake is rushing the drying process; if your stones aren't completely dry, they will crumble. Give them plenty of time, especially in humid climates. Pay close attention to the paste consistency in step 2; it should be firm enough to mold but not crumbly. Over time, the scent will fade; simply add a few more drops of your favorite essential oil directly onto the stone to refresh its aroma. A well-ventilated area isn't just for drying; it also helps the aroma diffuse better. Don't be limited to simple molds; cookie cutters are fantastic for themed stones, or you can roll out the dough and cut squares or circles.
Storage & Lifespan: If you've made a batch and aren't using them all right away, store them in an airtight container (like a glass jar with a lid) in a cool, dark place to preserve the essential oils' scent. The stones themselves will last indefinitely, but the essential oil's fragrance typically lasts anywhere from a few days to a few weeks before needing a refresh. Place your aroma stones in small decorative bowls, on a pretty tray, or even tucked into sachets in drawers. Ensure they are in a spot where they won't get wet, as water will reactivate the baking soda and cause them to soften.
FAQs: Yes, you can use fragrance oils instead of essential oils for a stronger, longer-lasting scent. If your aroma stones crumbled when removed from the mold, they were most likely not completely dry. You can certainly put these in your car as a natural air freshener; place one in a small mesh bag or a mini dish (out of direct sunlight). Molds clean easily with a simple rinse with warm water and soap.